Monitor your team
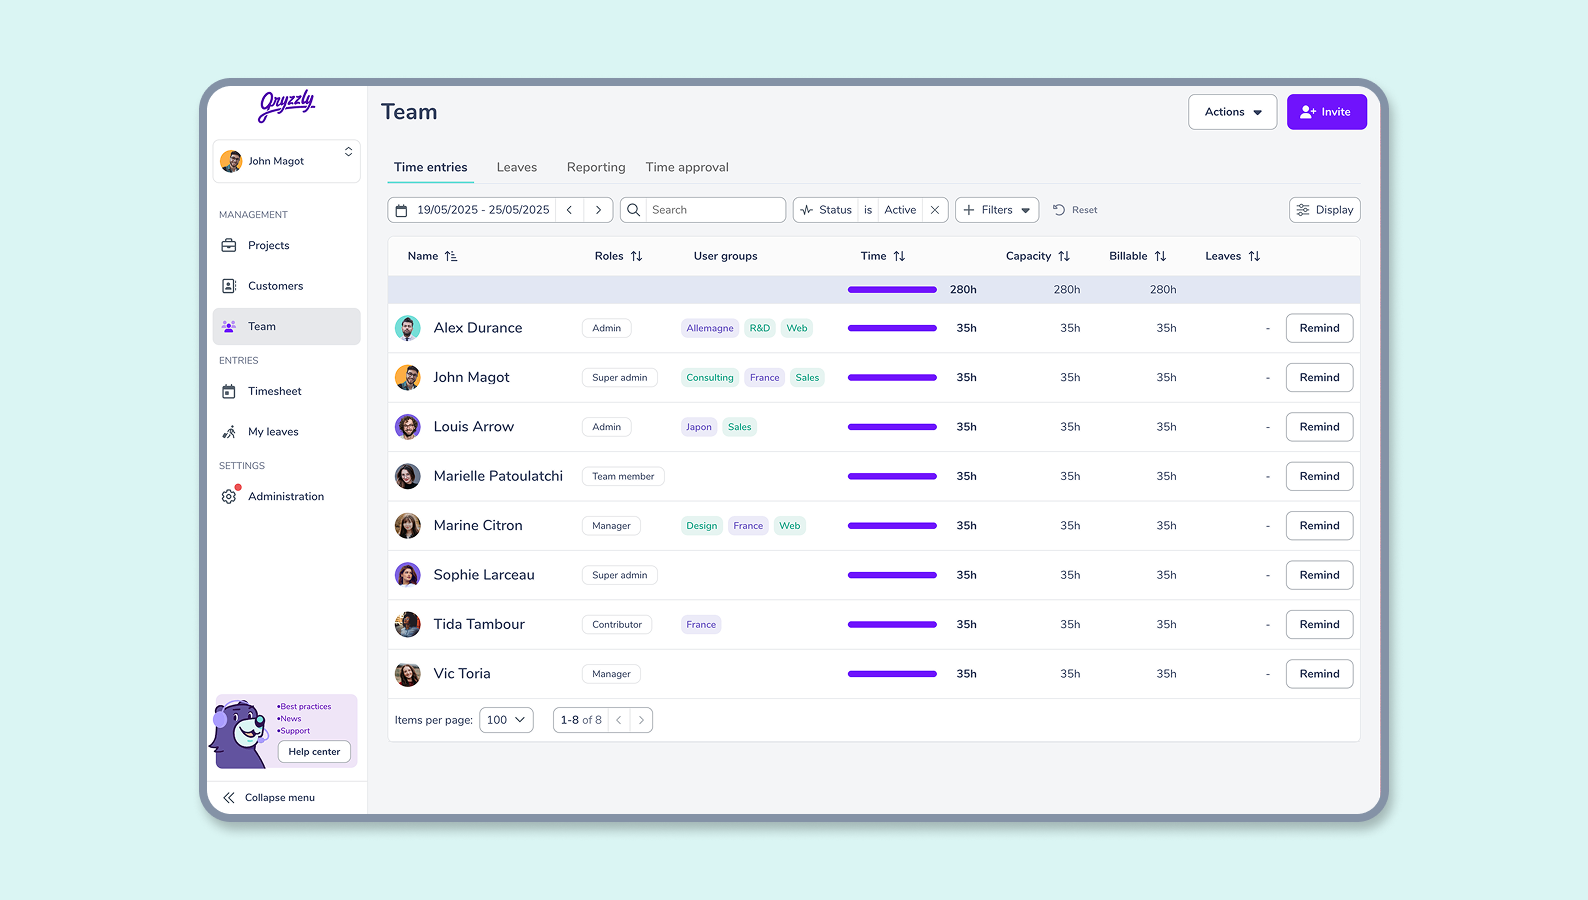
How to monitor my team?
In your dashboard, navigate to the Users view and the Leaves view from the left menu under the Management category.
This view allows you to track the time logged by your team members as well as their declared leaves.
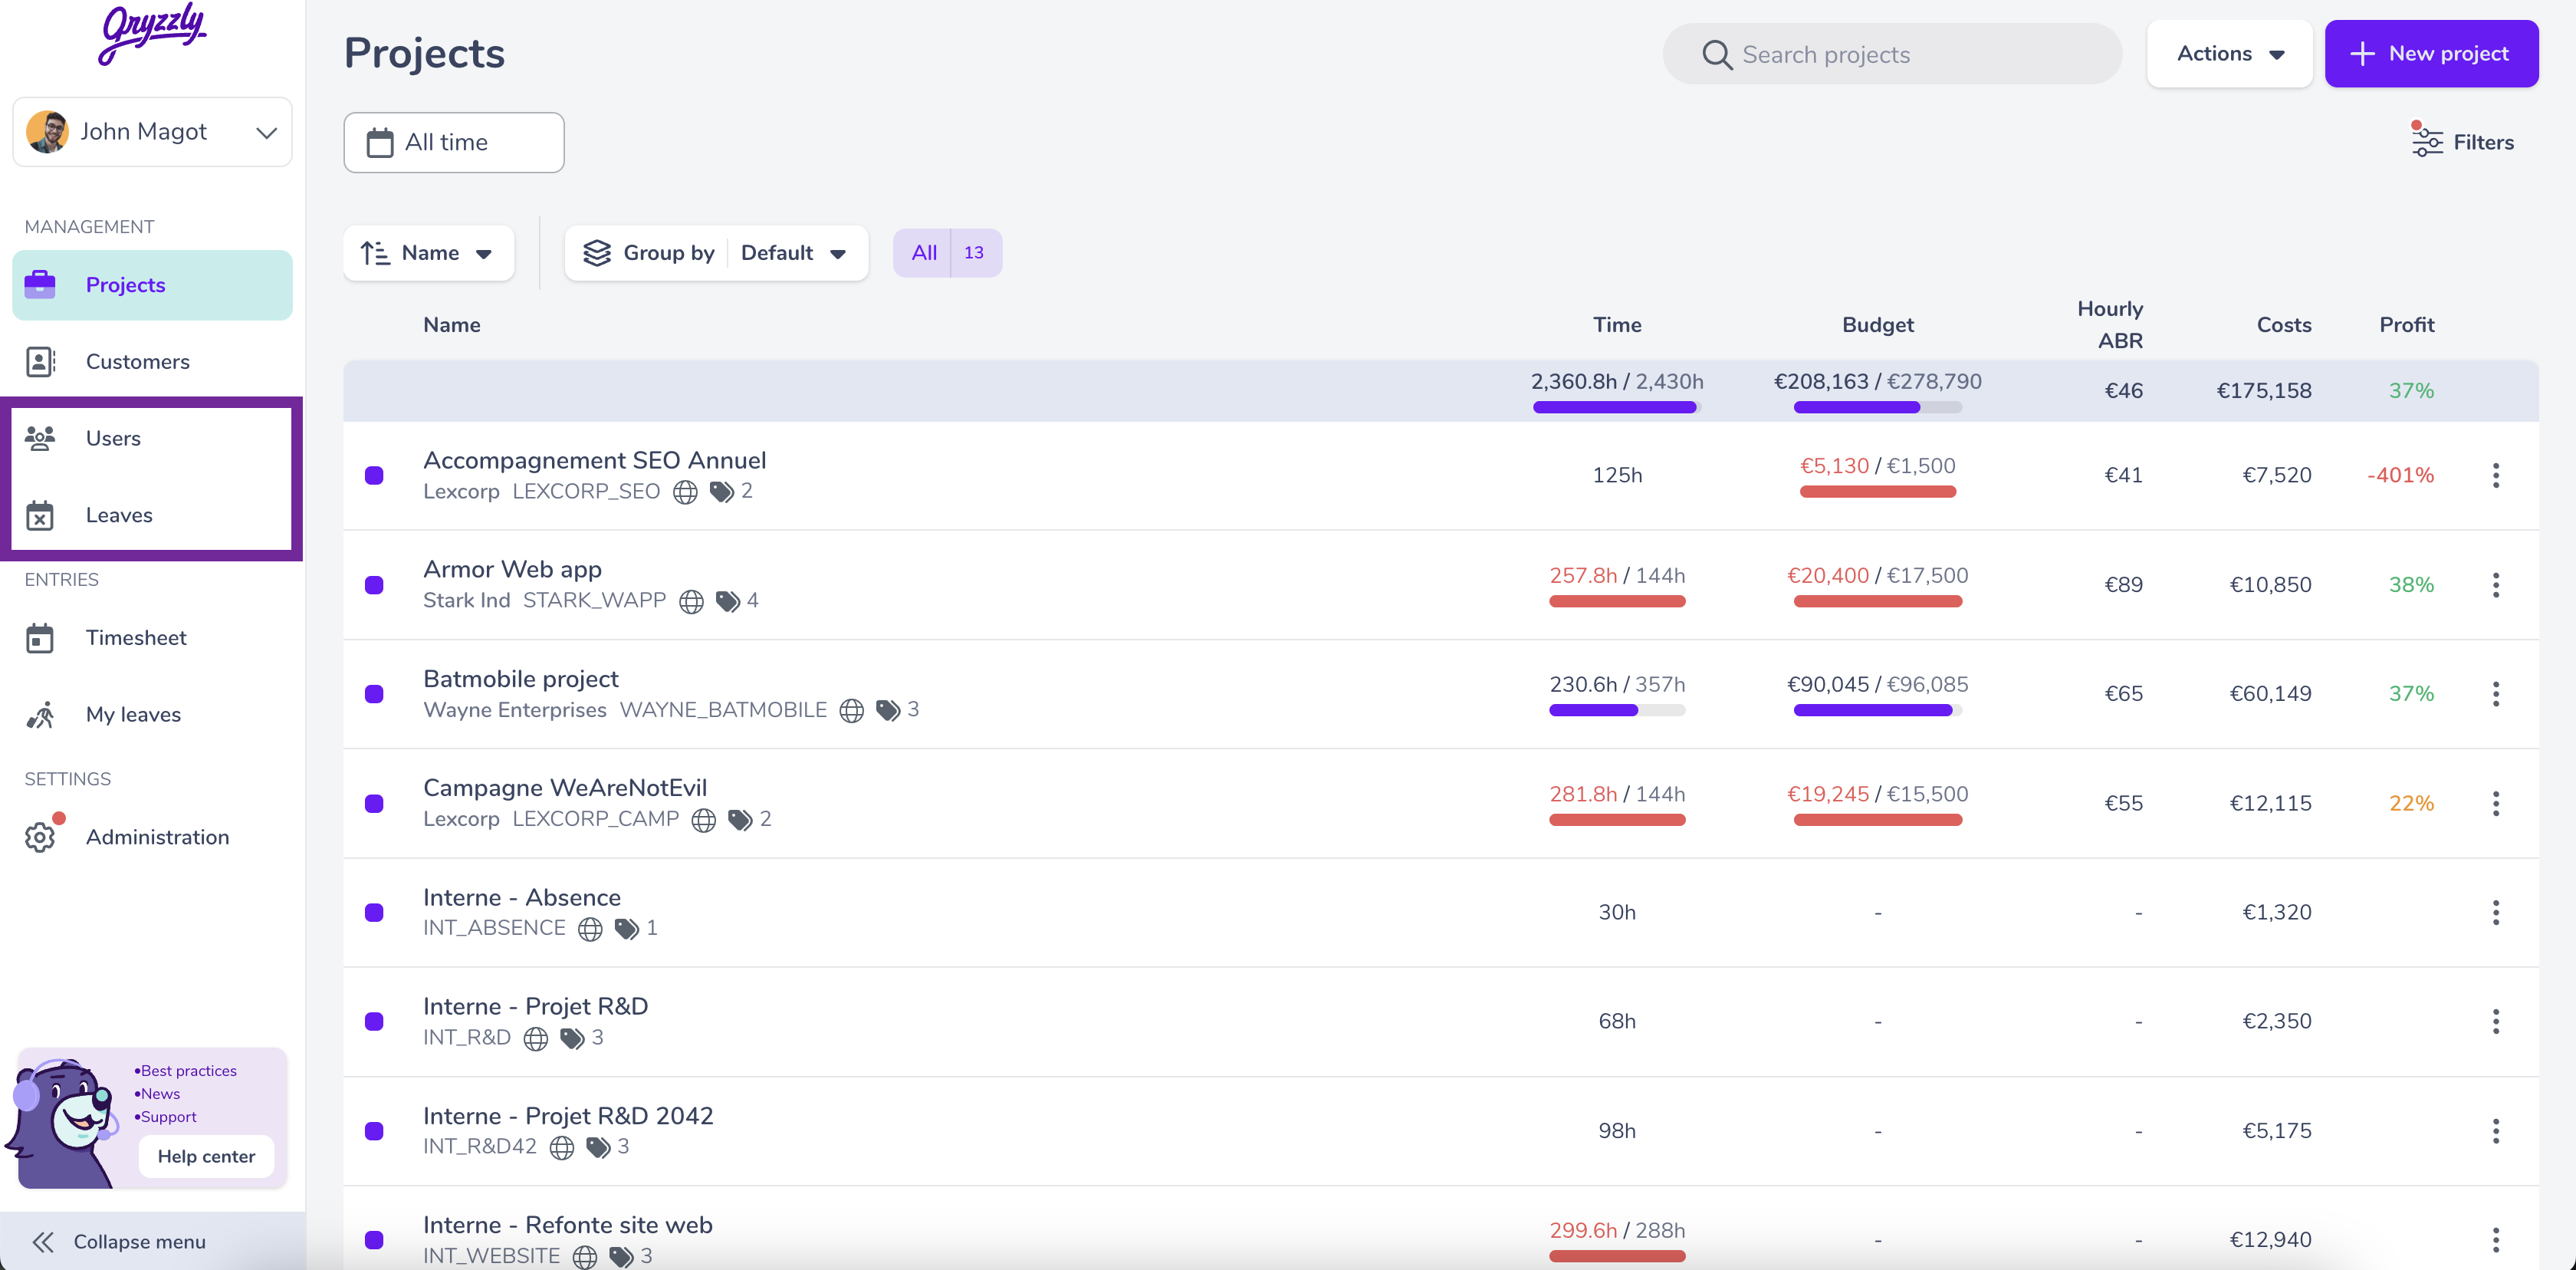
You can export both tabs to make more precise analyses and cross-reference the information offered by Gryzzly 📈
Working time tab
In the Users view , you can find all the information concerning the entries of your employees!
👉 You will be able to see at a glance the list of your team members with, for each one :
- The teams to which they belong,
- The volume of hours entered over the chosen period,
- Their role
- The status of their reminders (daily or disable)

💡 If you are a team manager, your view will automatically be filtered to the teams you are responsible for!
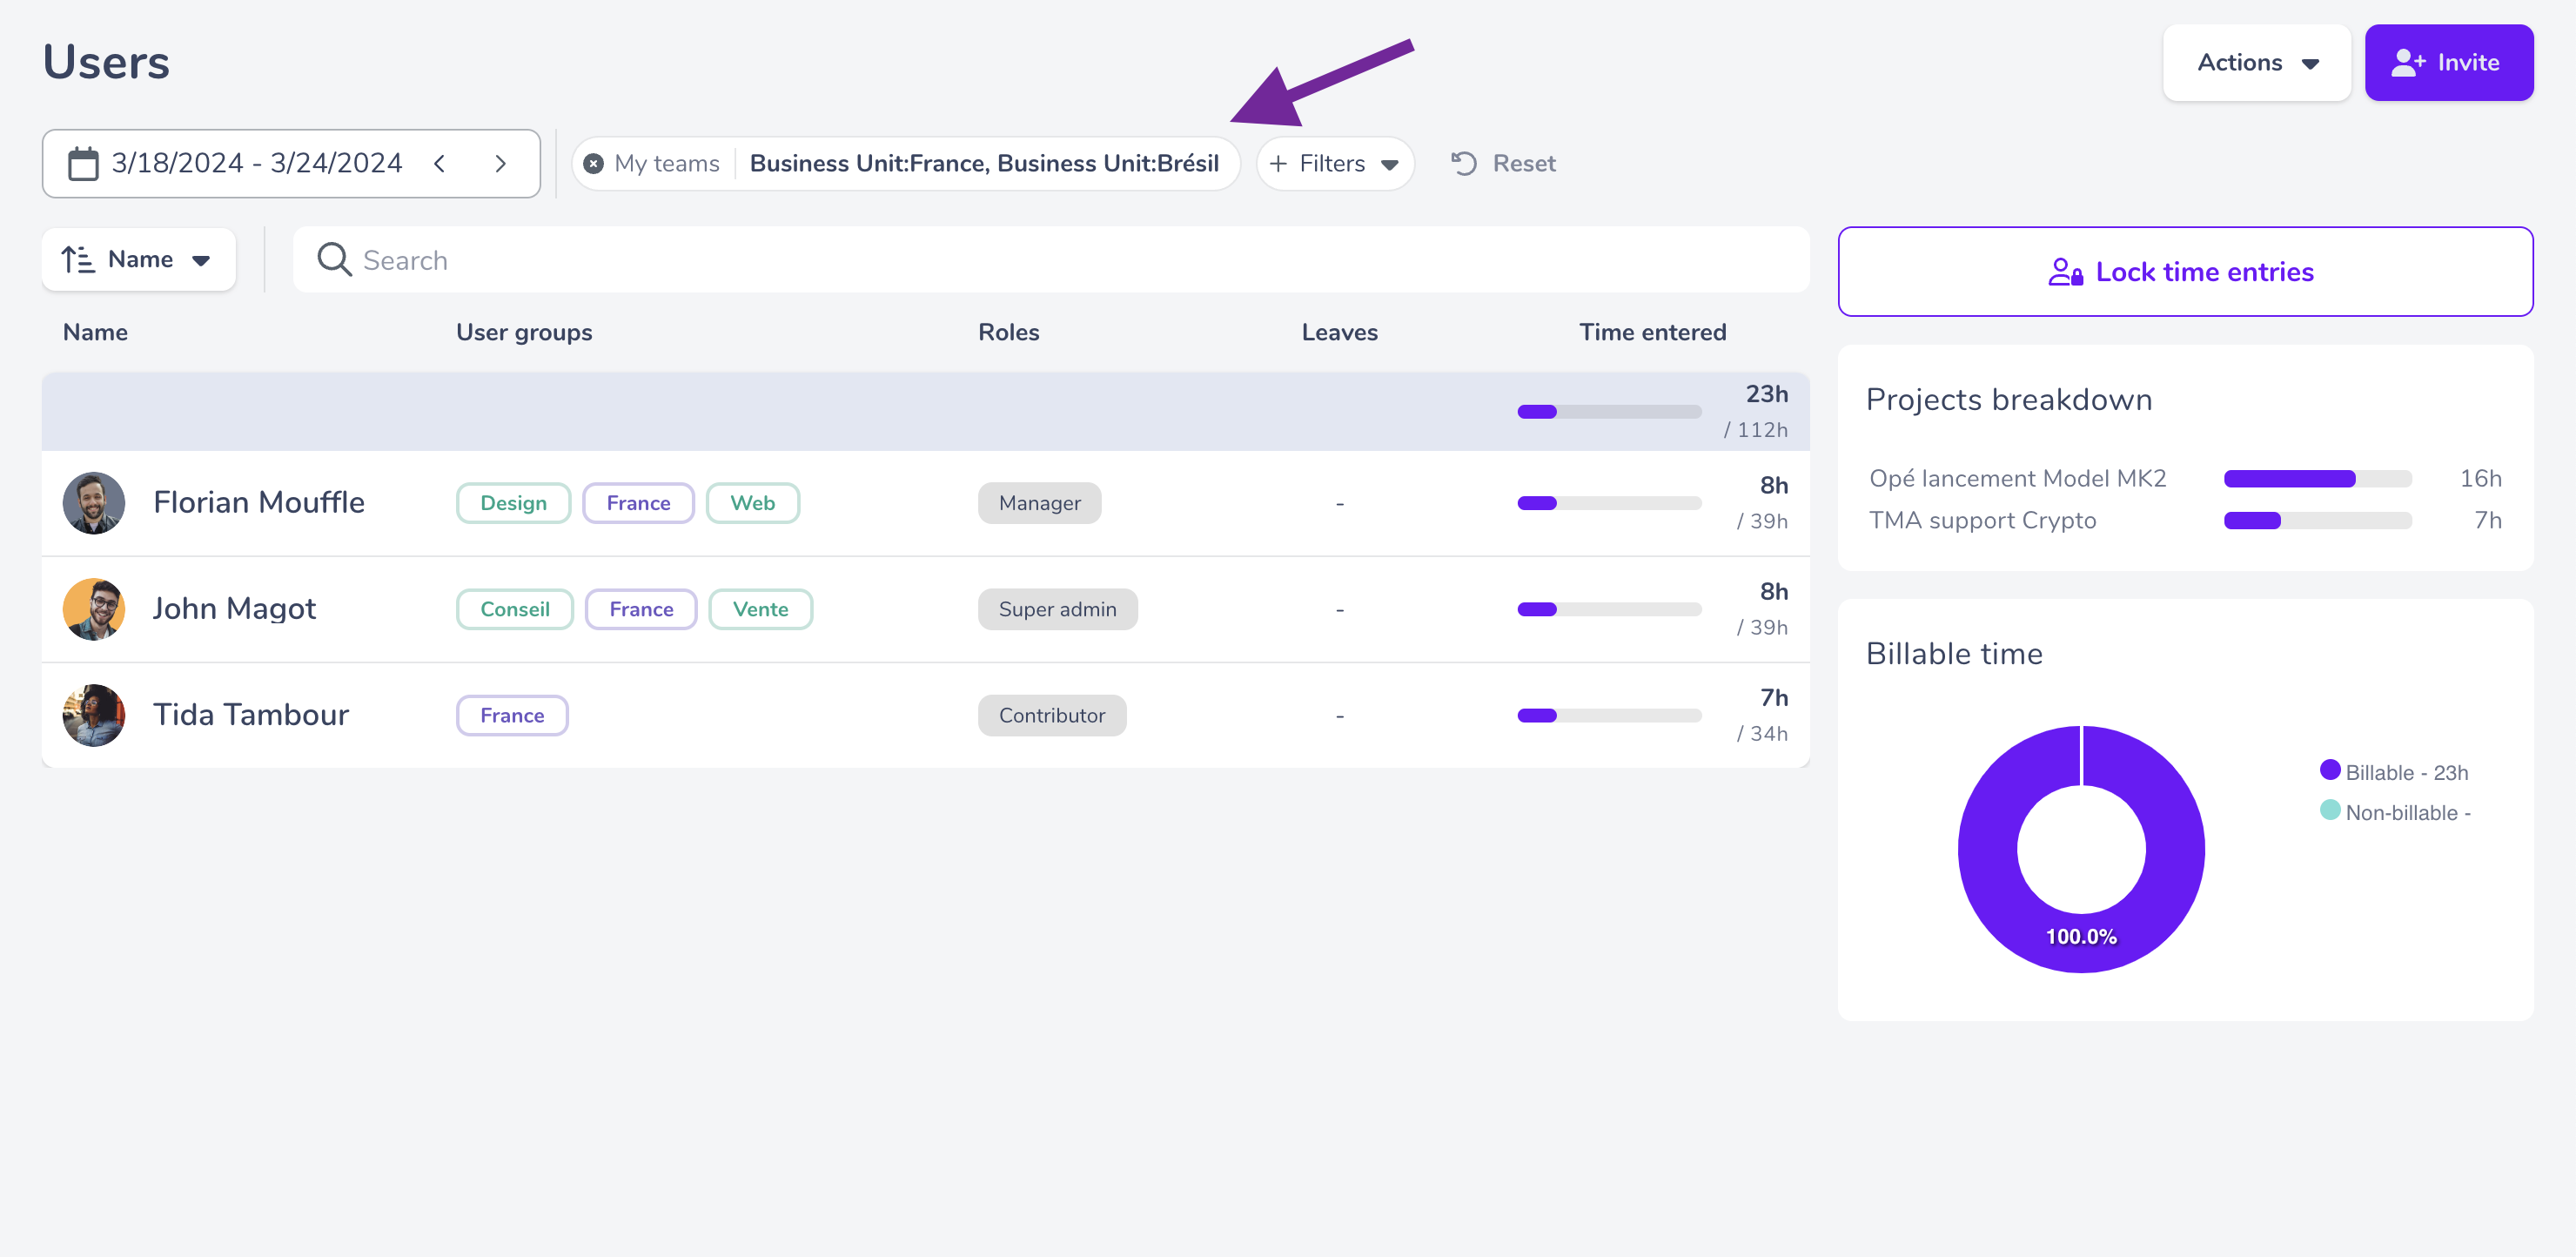
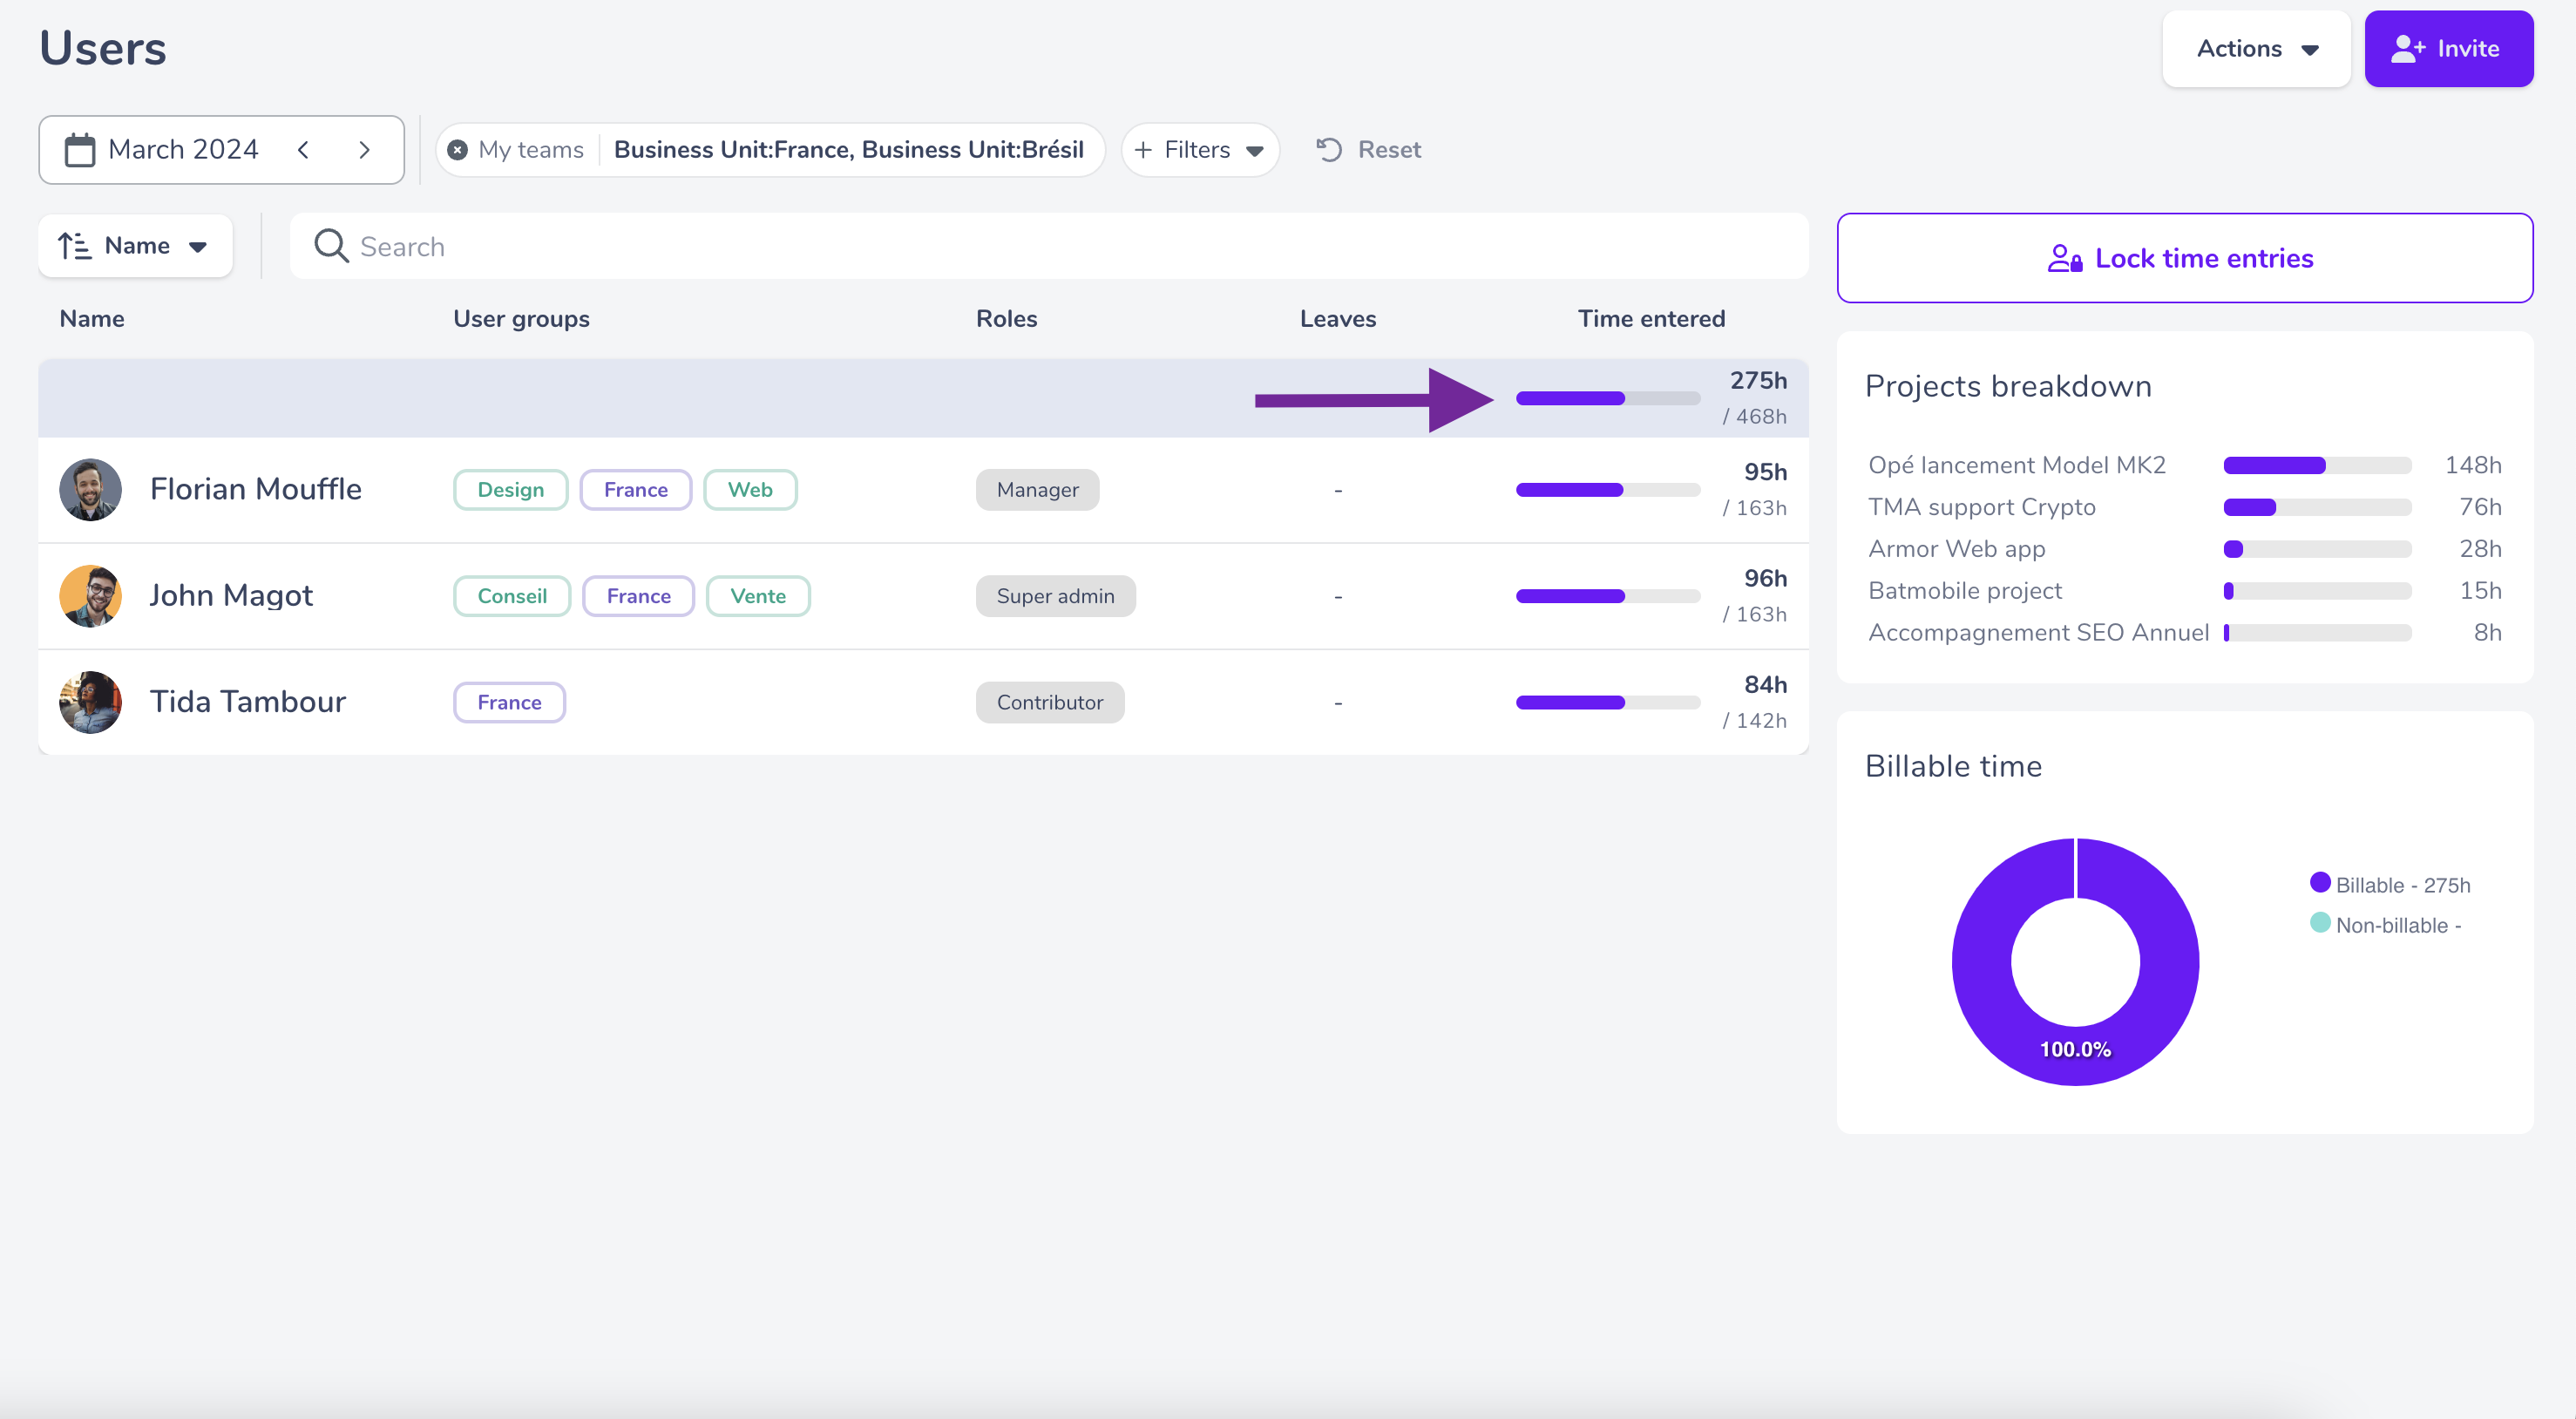
👉 You will also find a more global view on :
-
The volume of hours entered over the chosen period
-
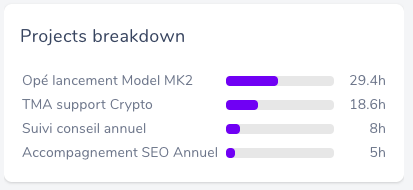
The distribution of the time spent per project
- A graph of the distribution of time spent on billable and non-billable projects
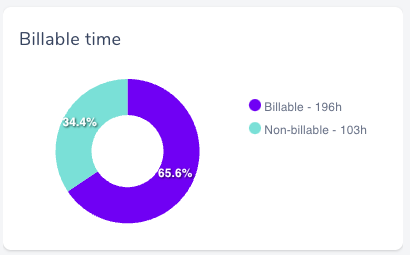
These indicators allow you to have a quick visibility of your team’s effort, and consequently to adjust if it is not distributed in the right way.
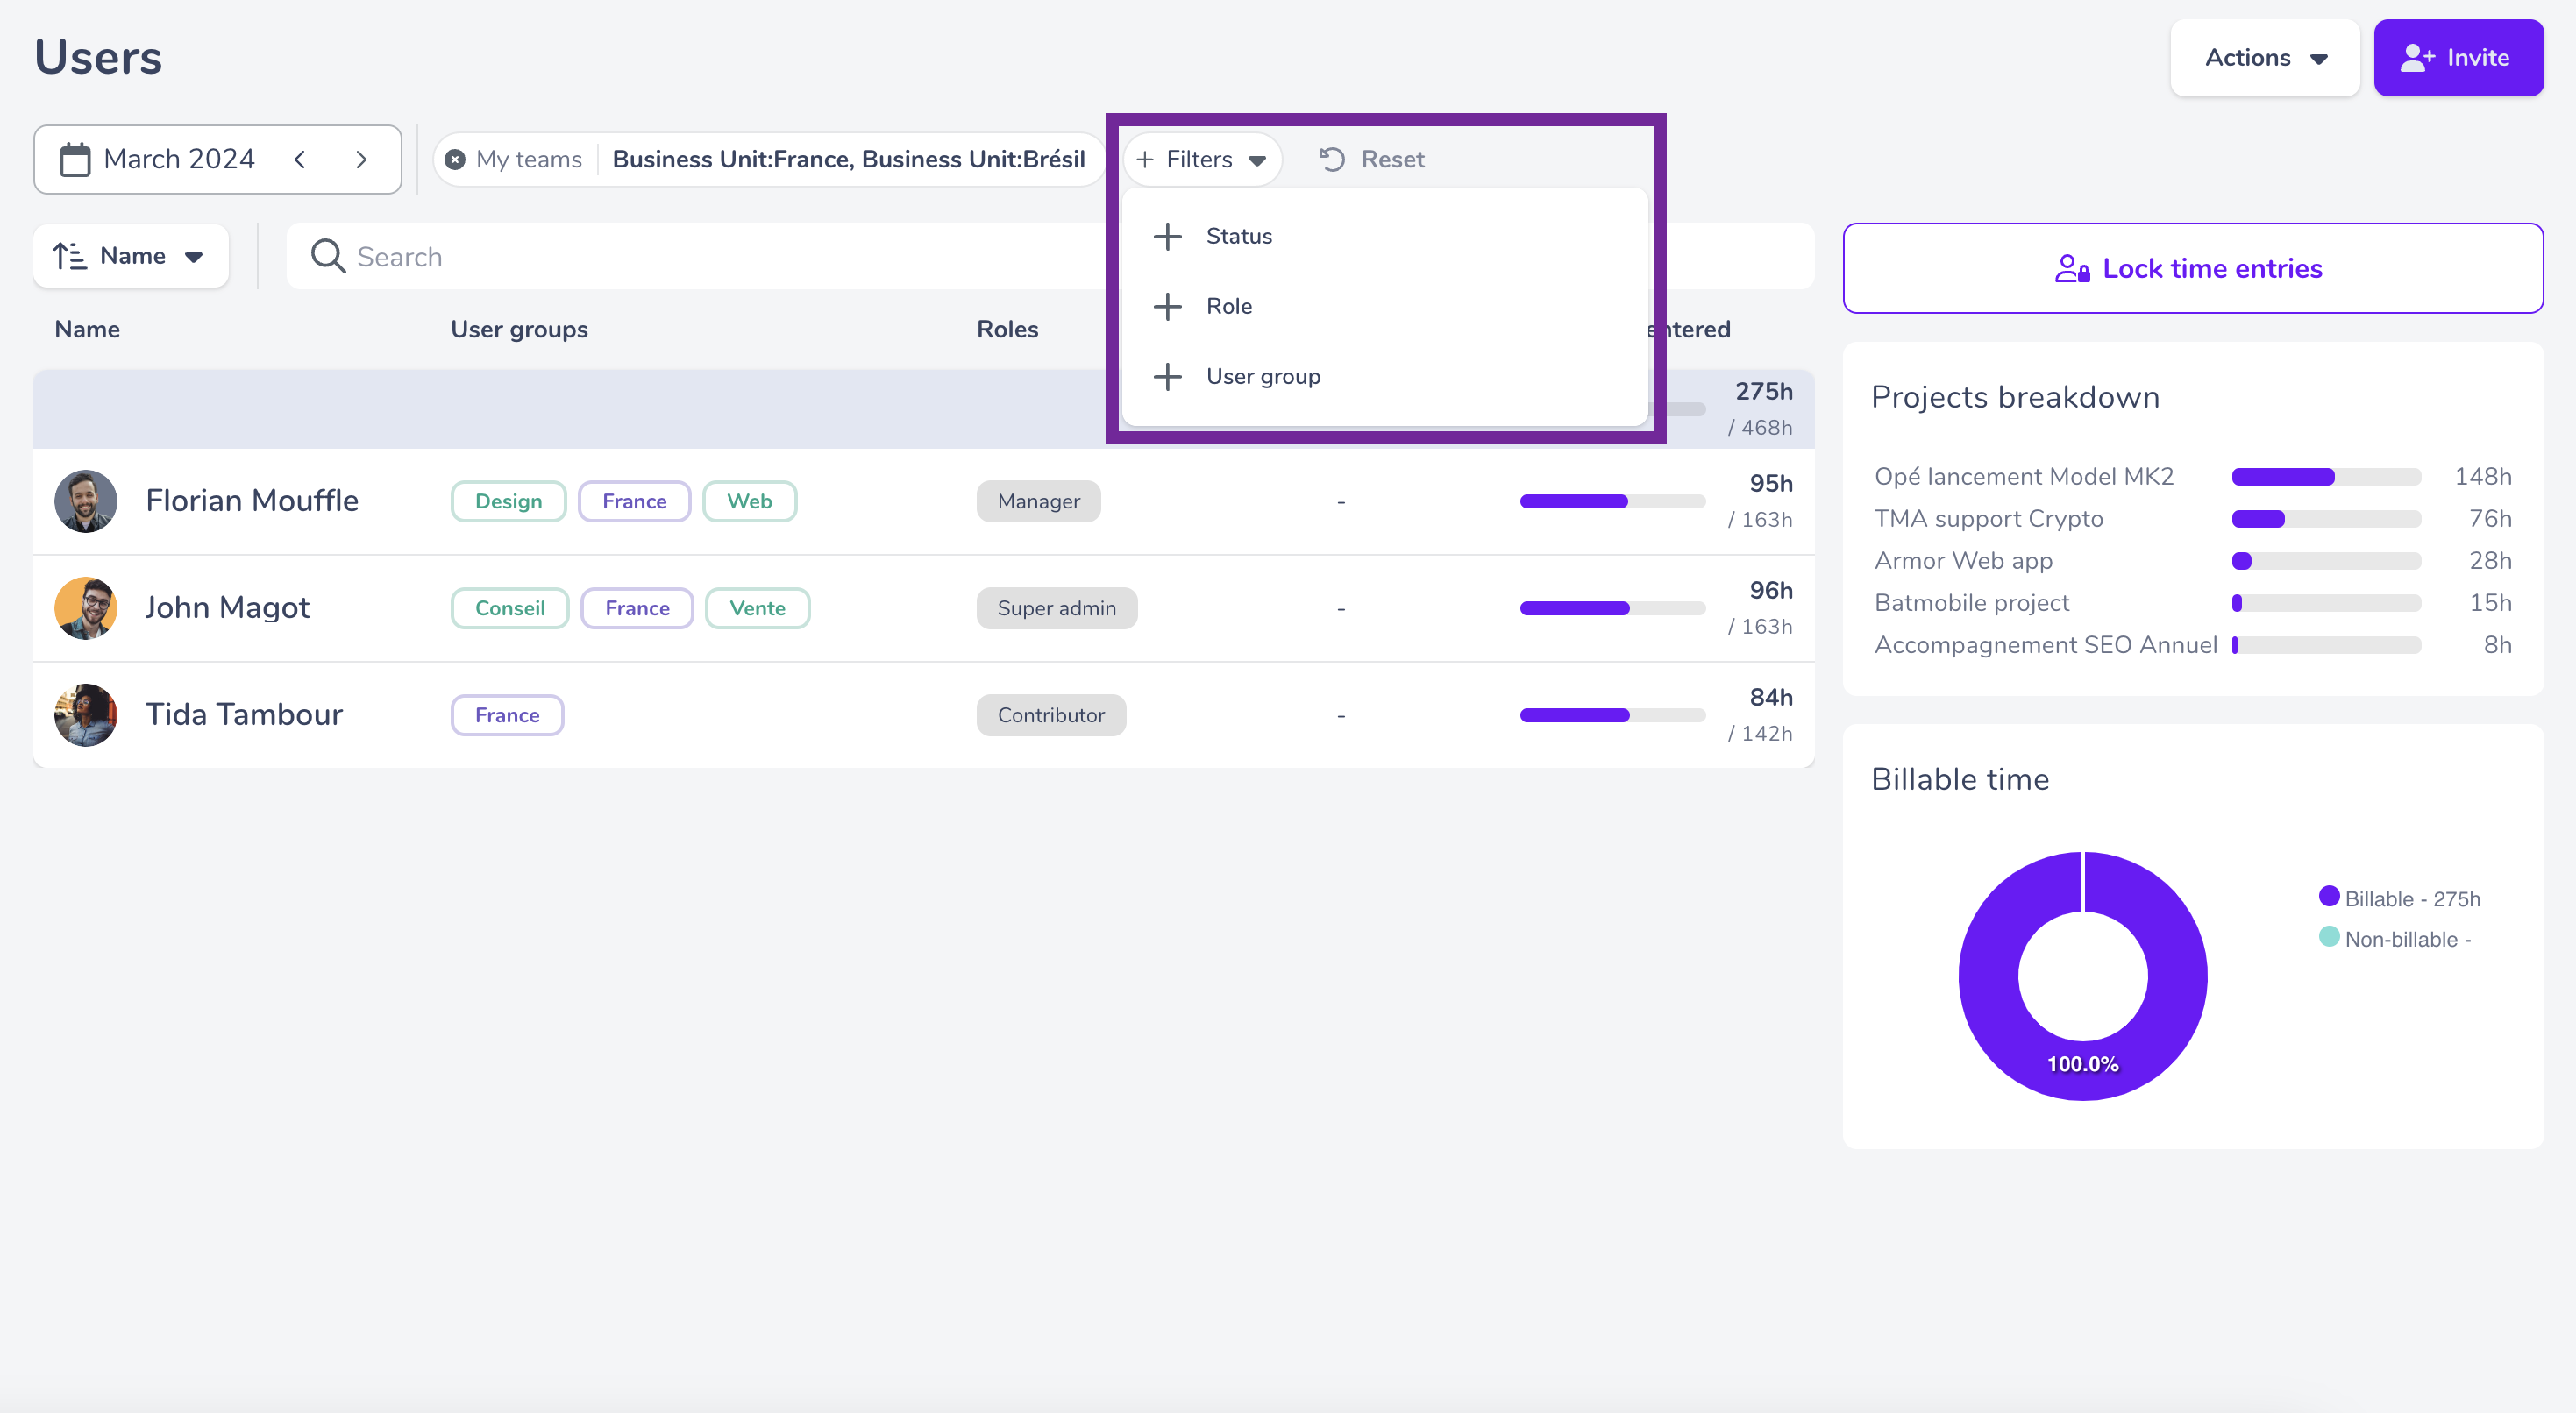
👉 Use the filters! They will allow you to choose more precise analysis axes according to your needs.
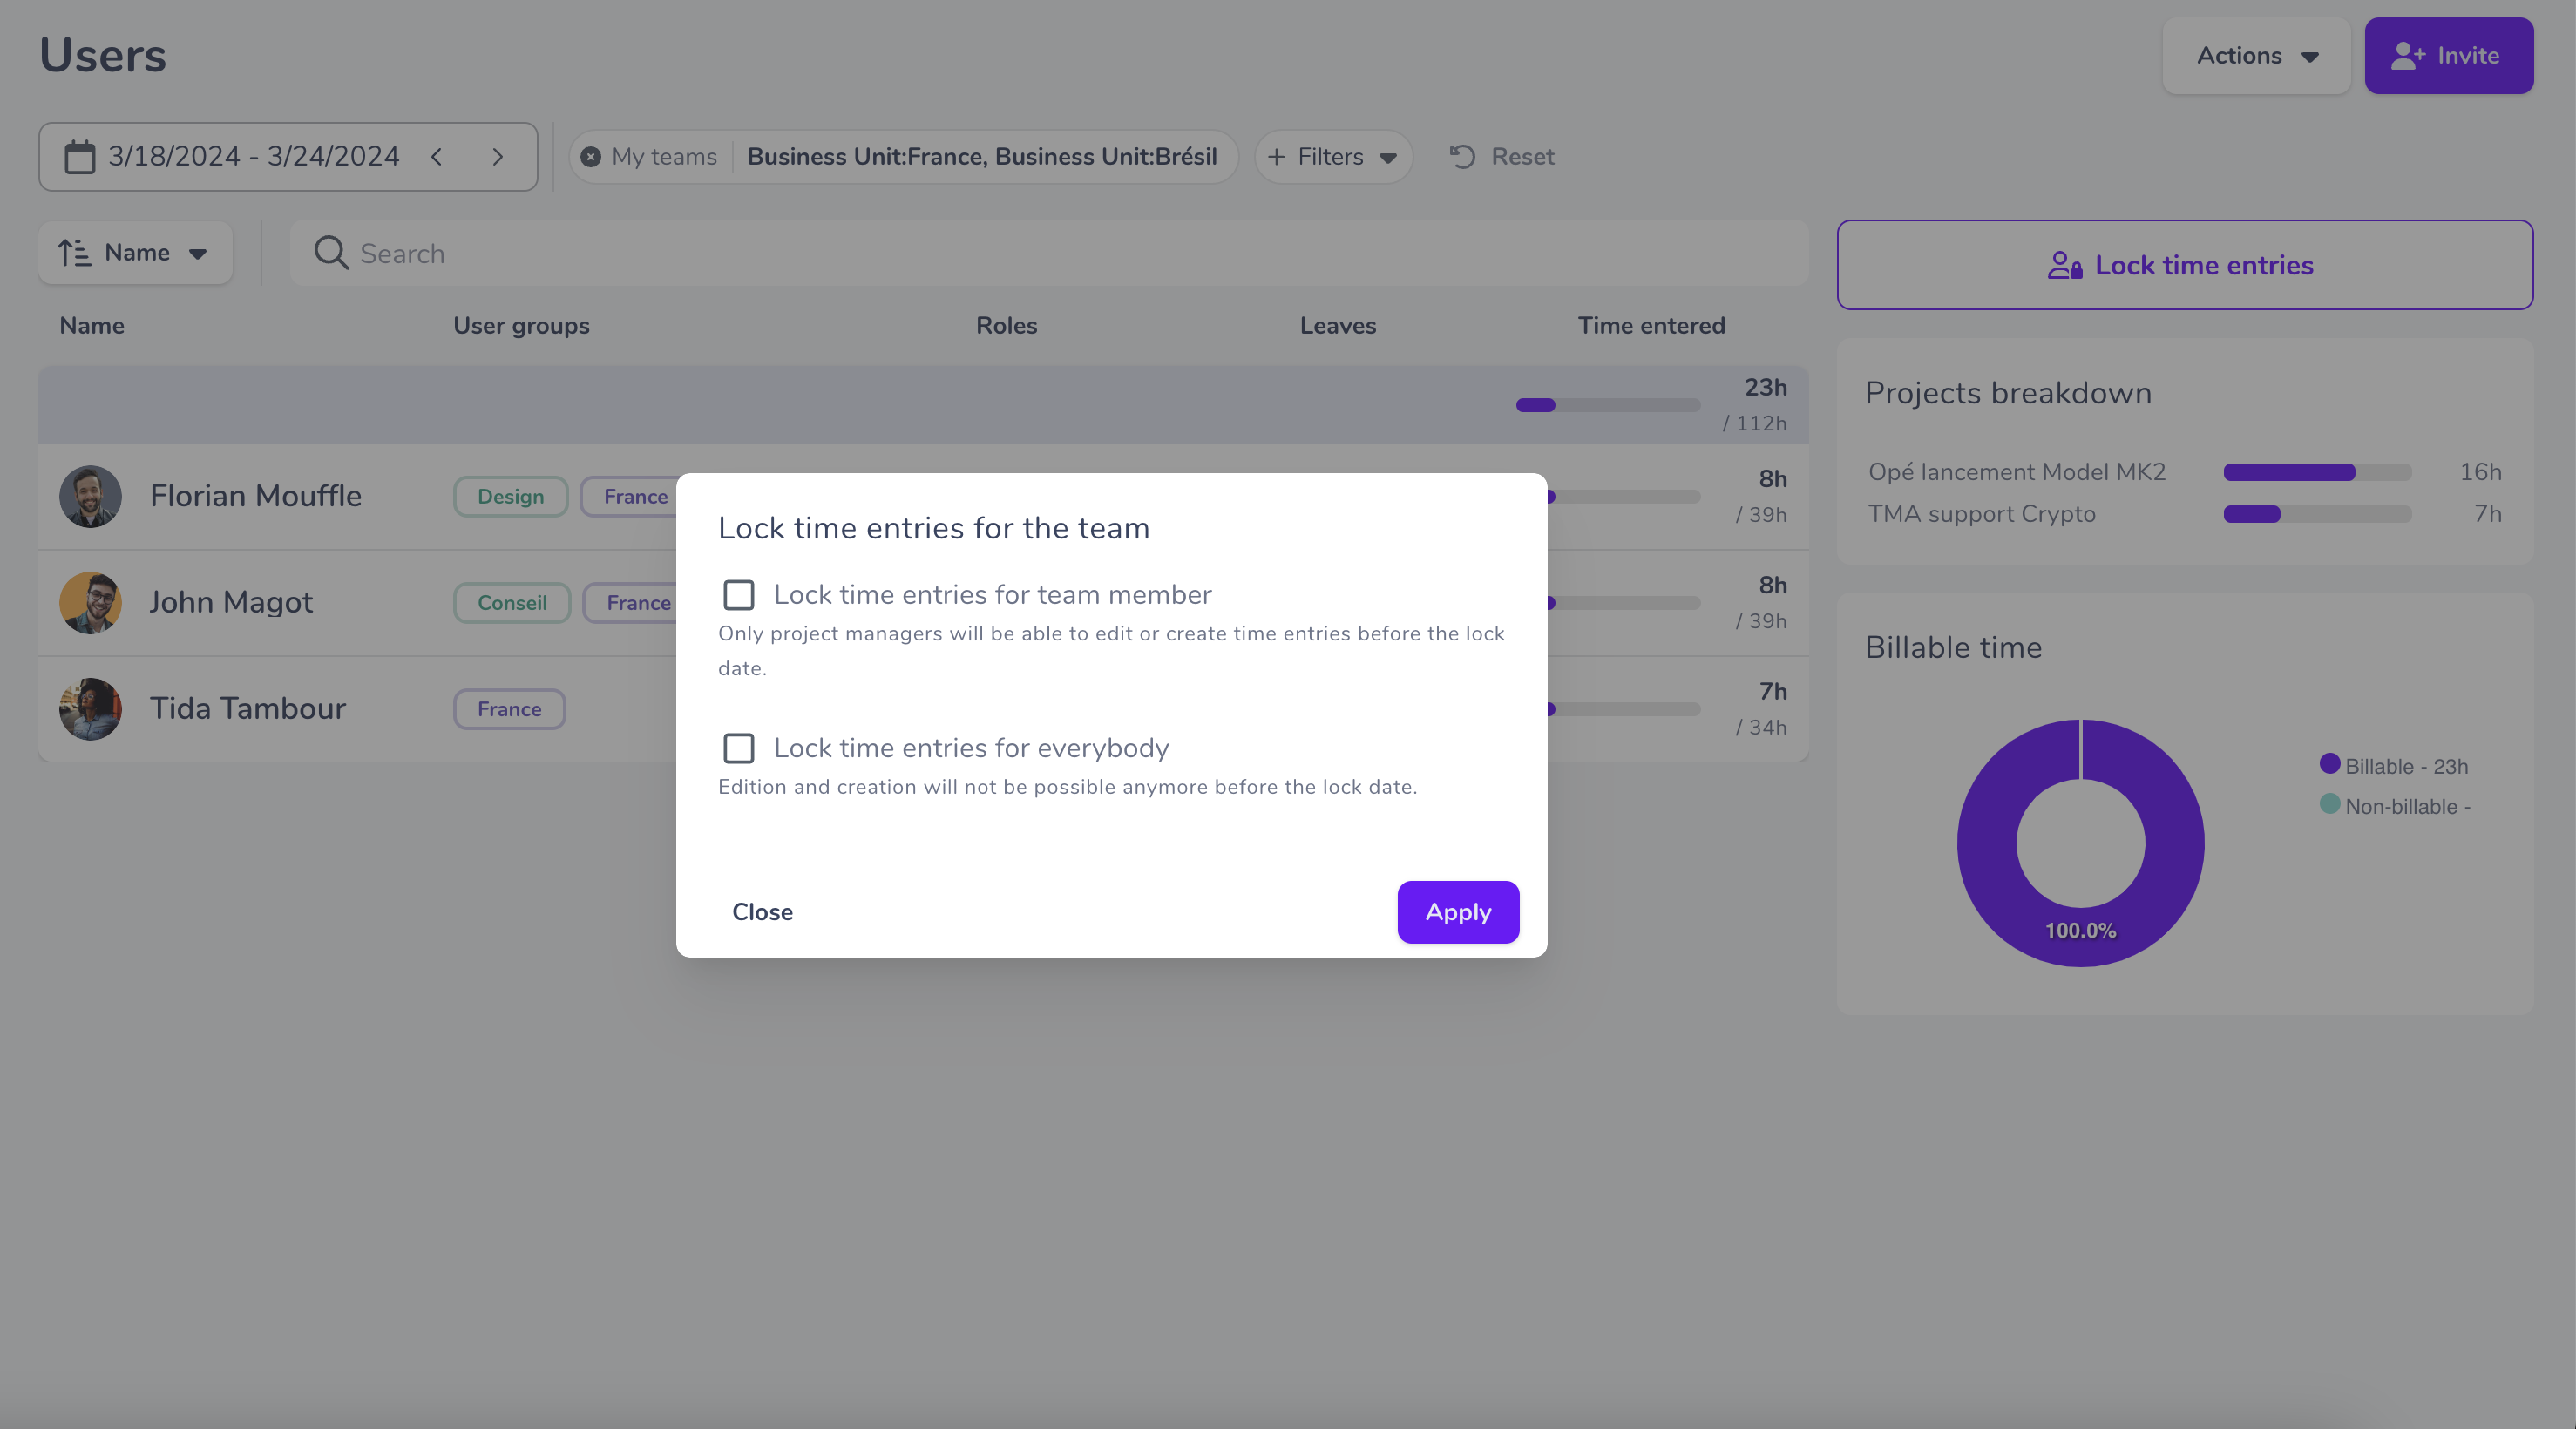
👉 Using the input locking feature will ensure that once your analyses are done, the inputs cannot be modified anymore!
2 possibilities:
- Lock entries for everyone
- Lock the entries only for the collaborators, the admins will still be able to enter
In both cases, you must choose a date before which the entries will be blocked.
👉 By clicking on the name of a collaborator, you can access his file. From here, you can consult and edit his declarations.
Leaves tab
In the leaves tab, you will find all the leaves of your employees.
Create leaves
If you want to enter leaves for your team, click here 👇
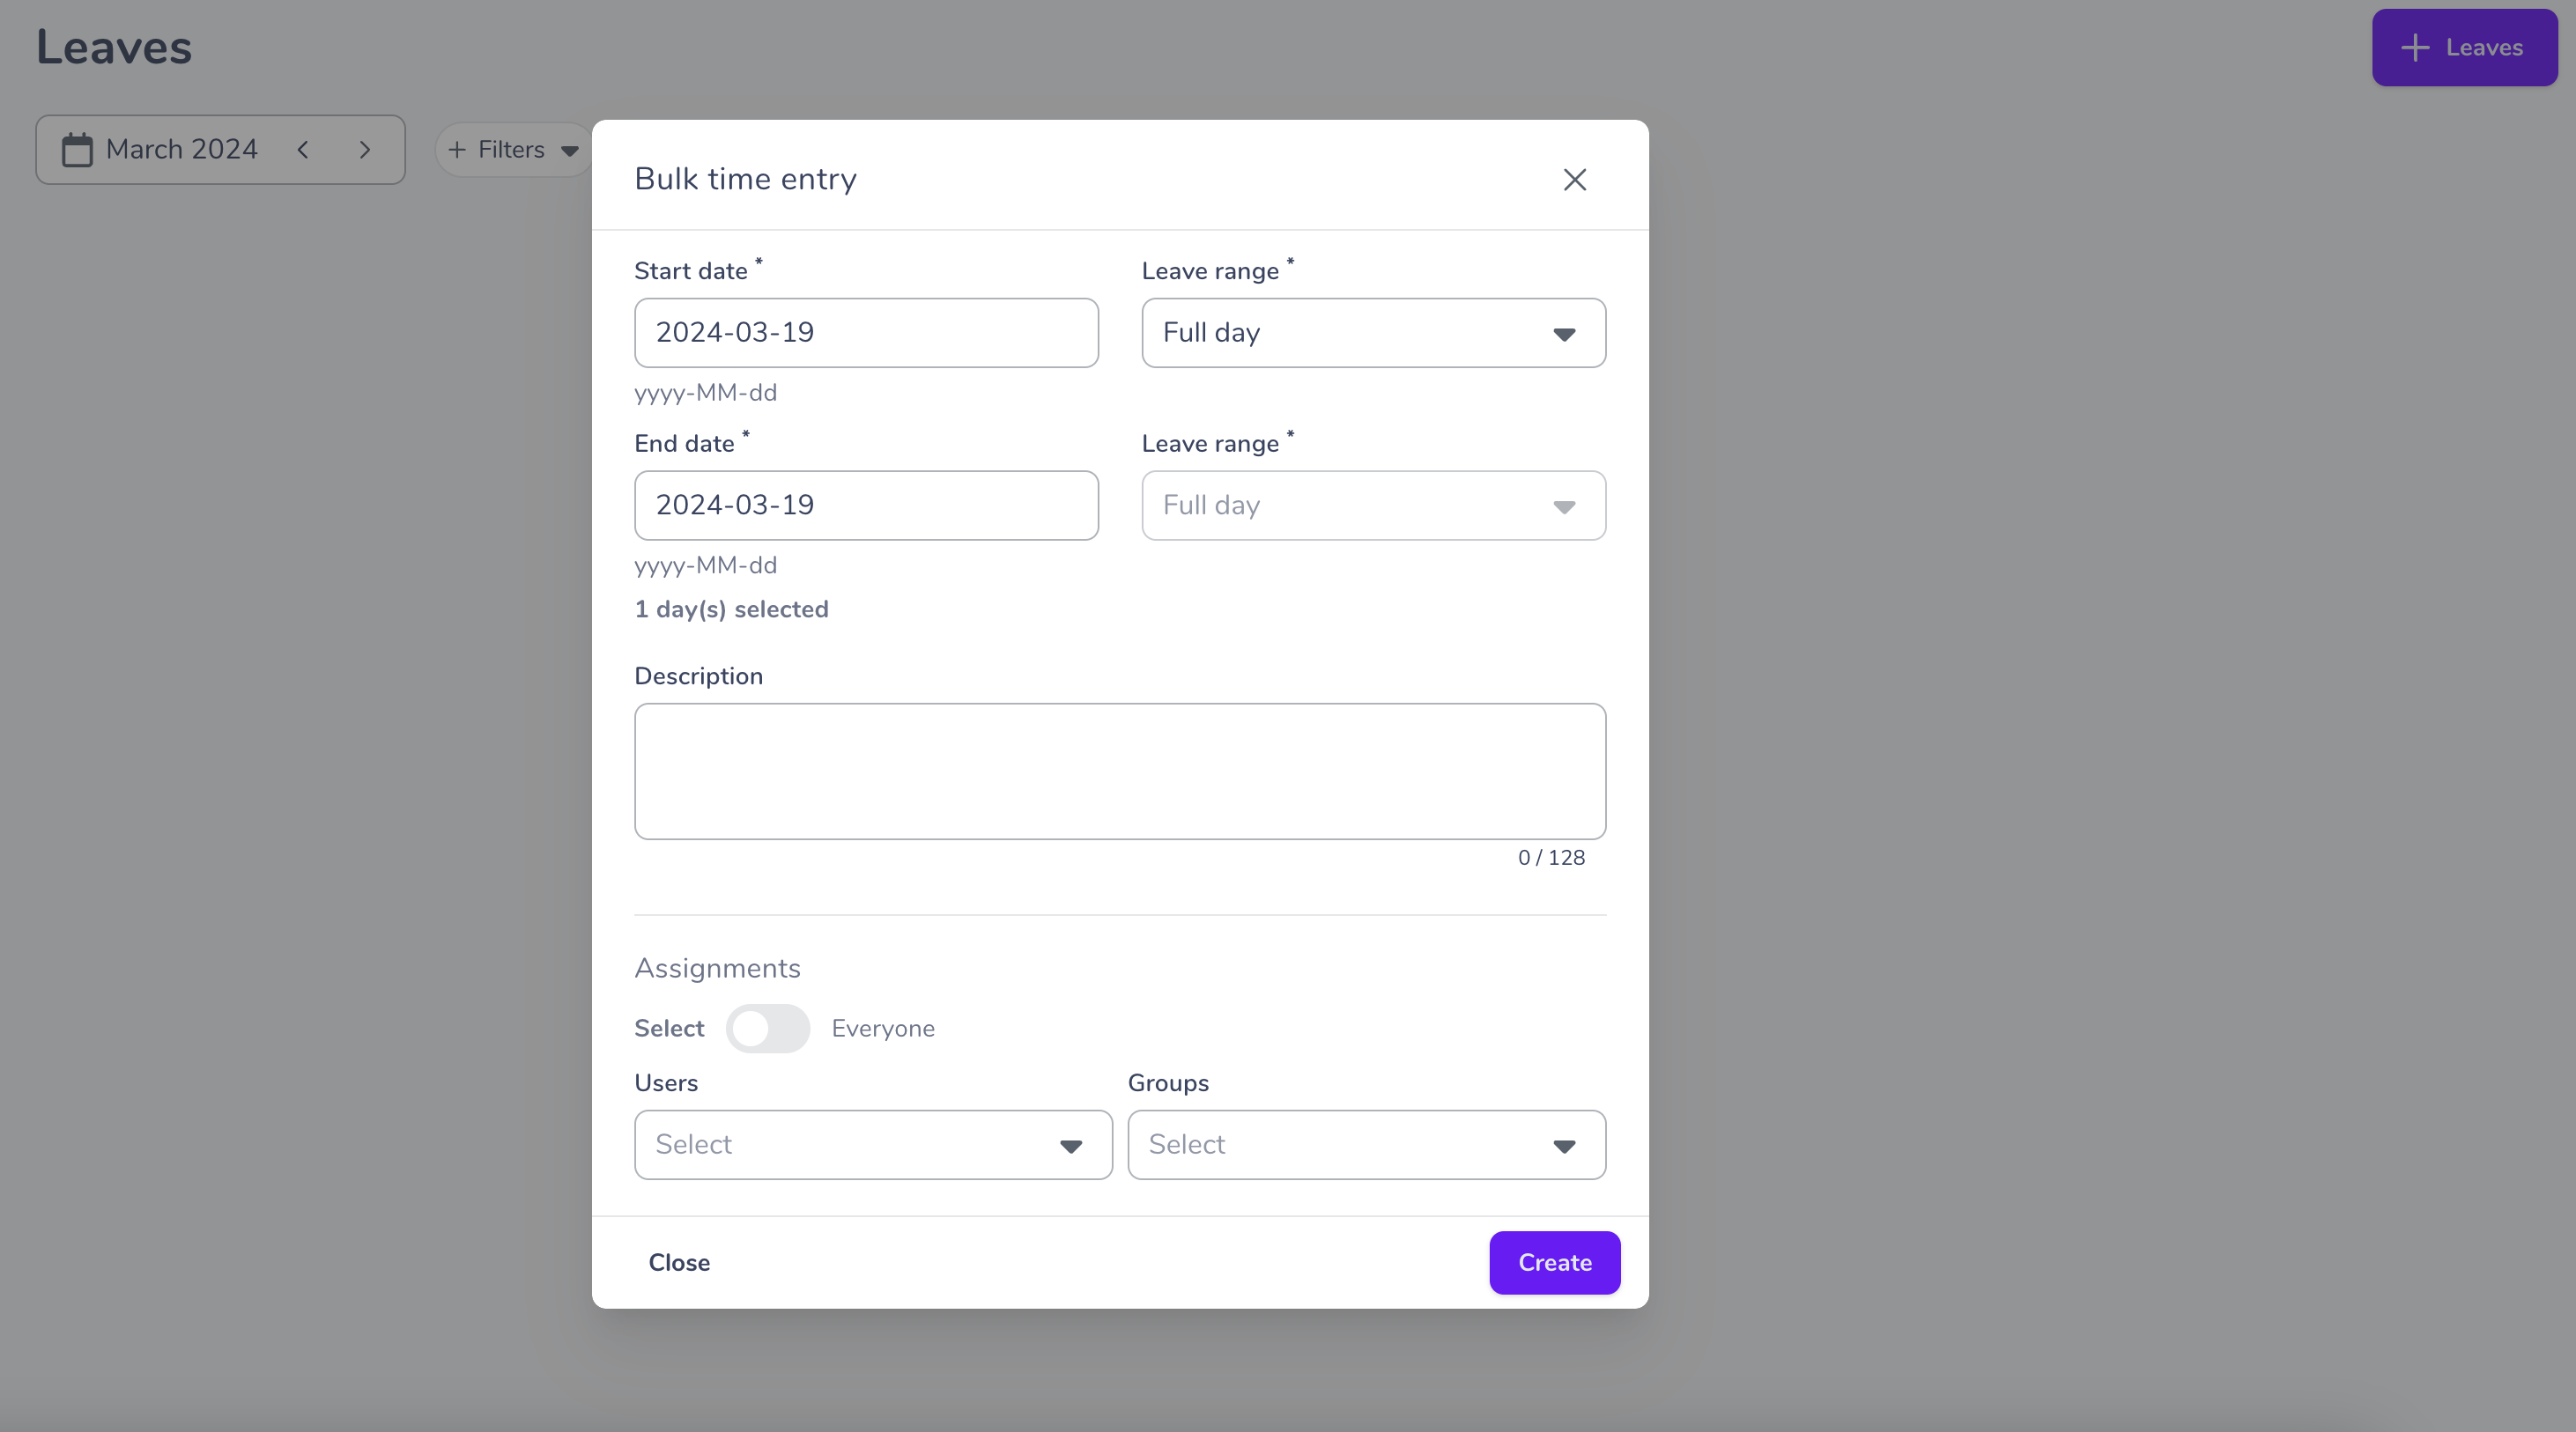
In the leaves tab, click on “Create leaves” in the center of your screen or on “+ mass creation” in the top right-hand corner if you already have a leave for the period.
As for declaring your absences, once the window for adding an absence is open, you only have to fill in the start and end dates of the absence.
You can also add a description to specify the reason for the leave (optional).
Finally, you must assign the leave. There are 3 possibilities:
- Enter a leave for everyone
- Enter a leave for specific employees
- Enter a leave for teams
You just have to validate ✅
Editing leaves
Did you make a mistake when creating leaves? You can edit them! 😃
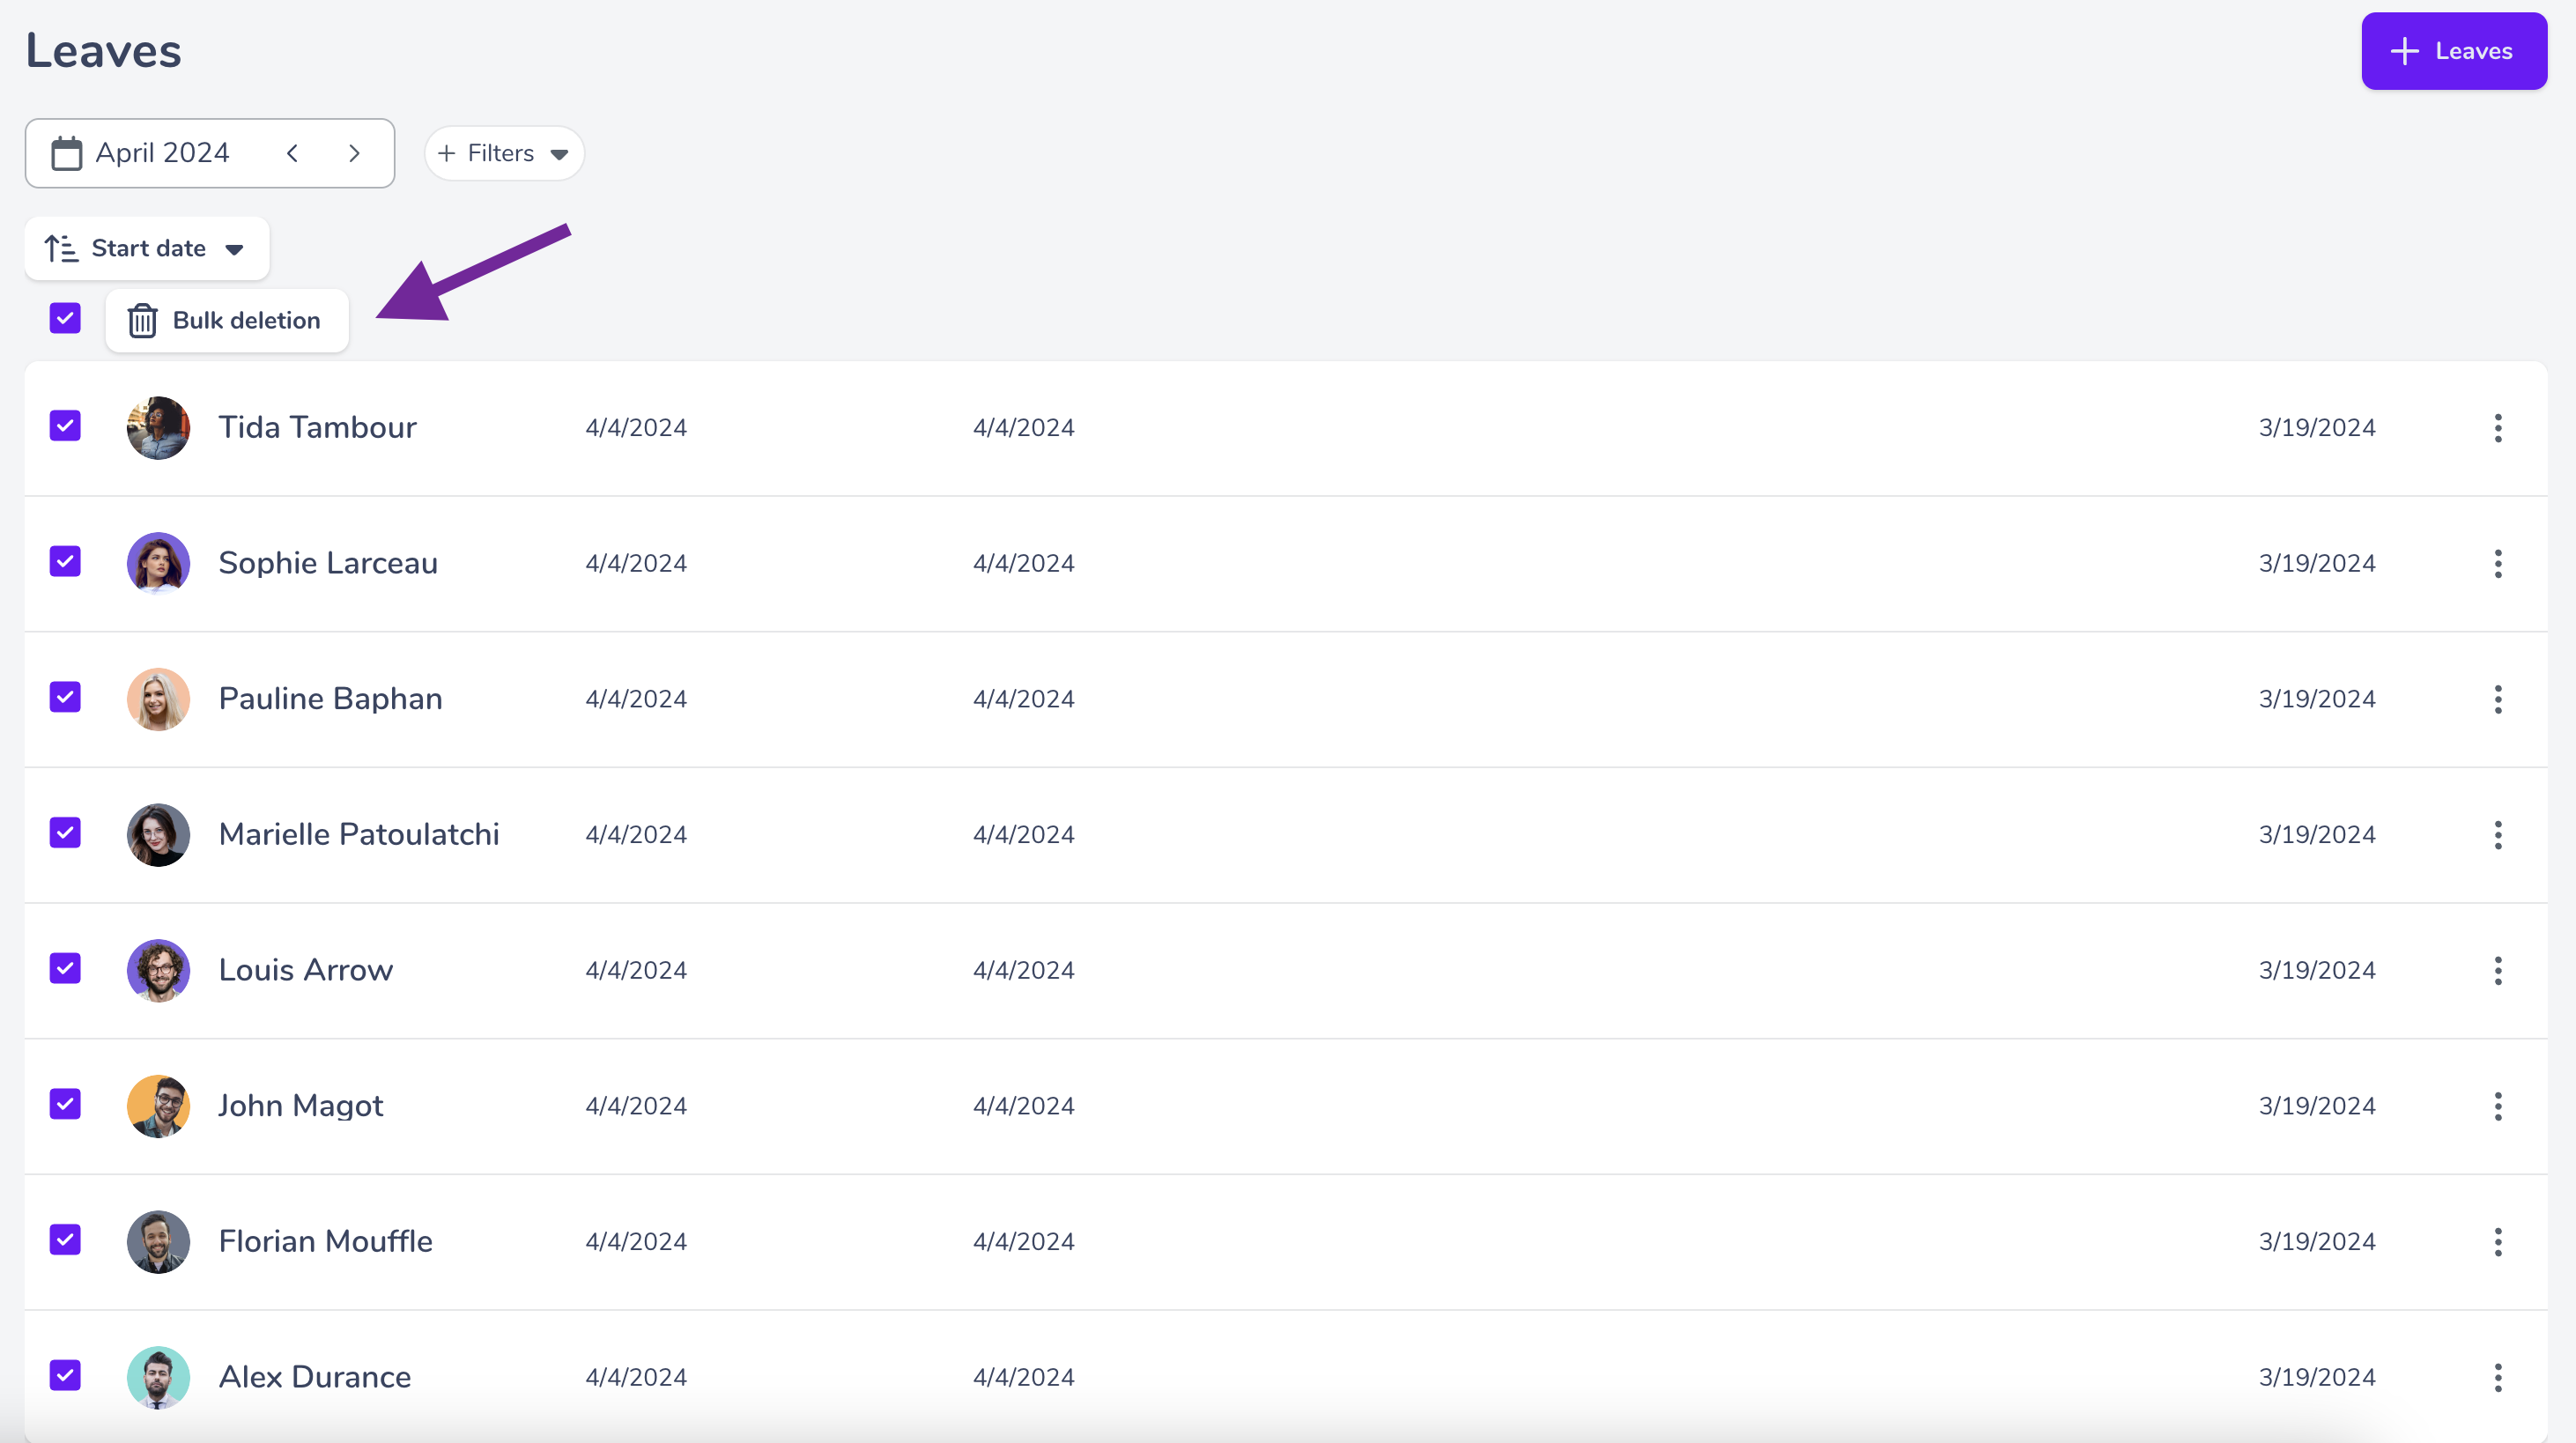
- Delete leaves in bulk
Just select the people concerned and click on “bulk deletation” 🗑
- Delete and edit in bulk
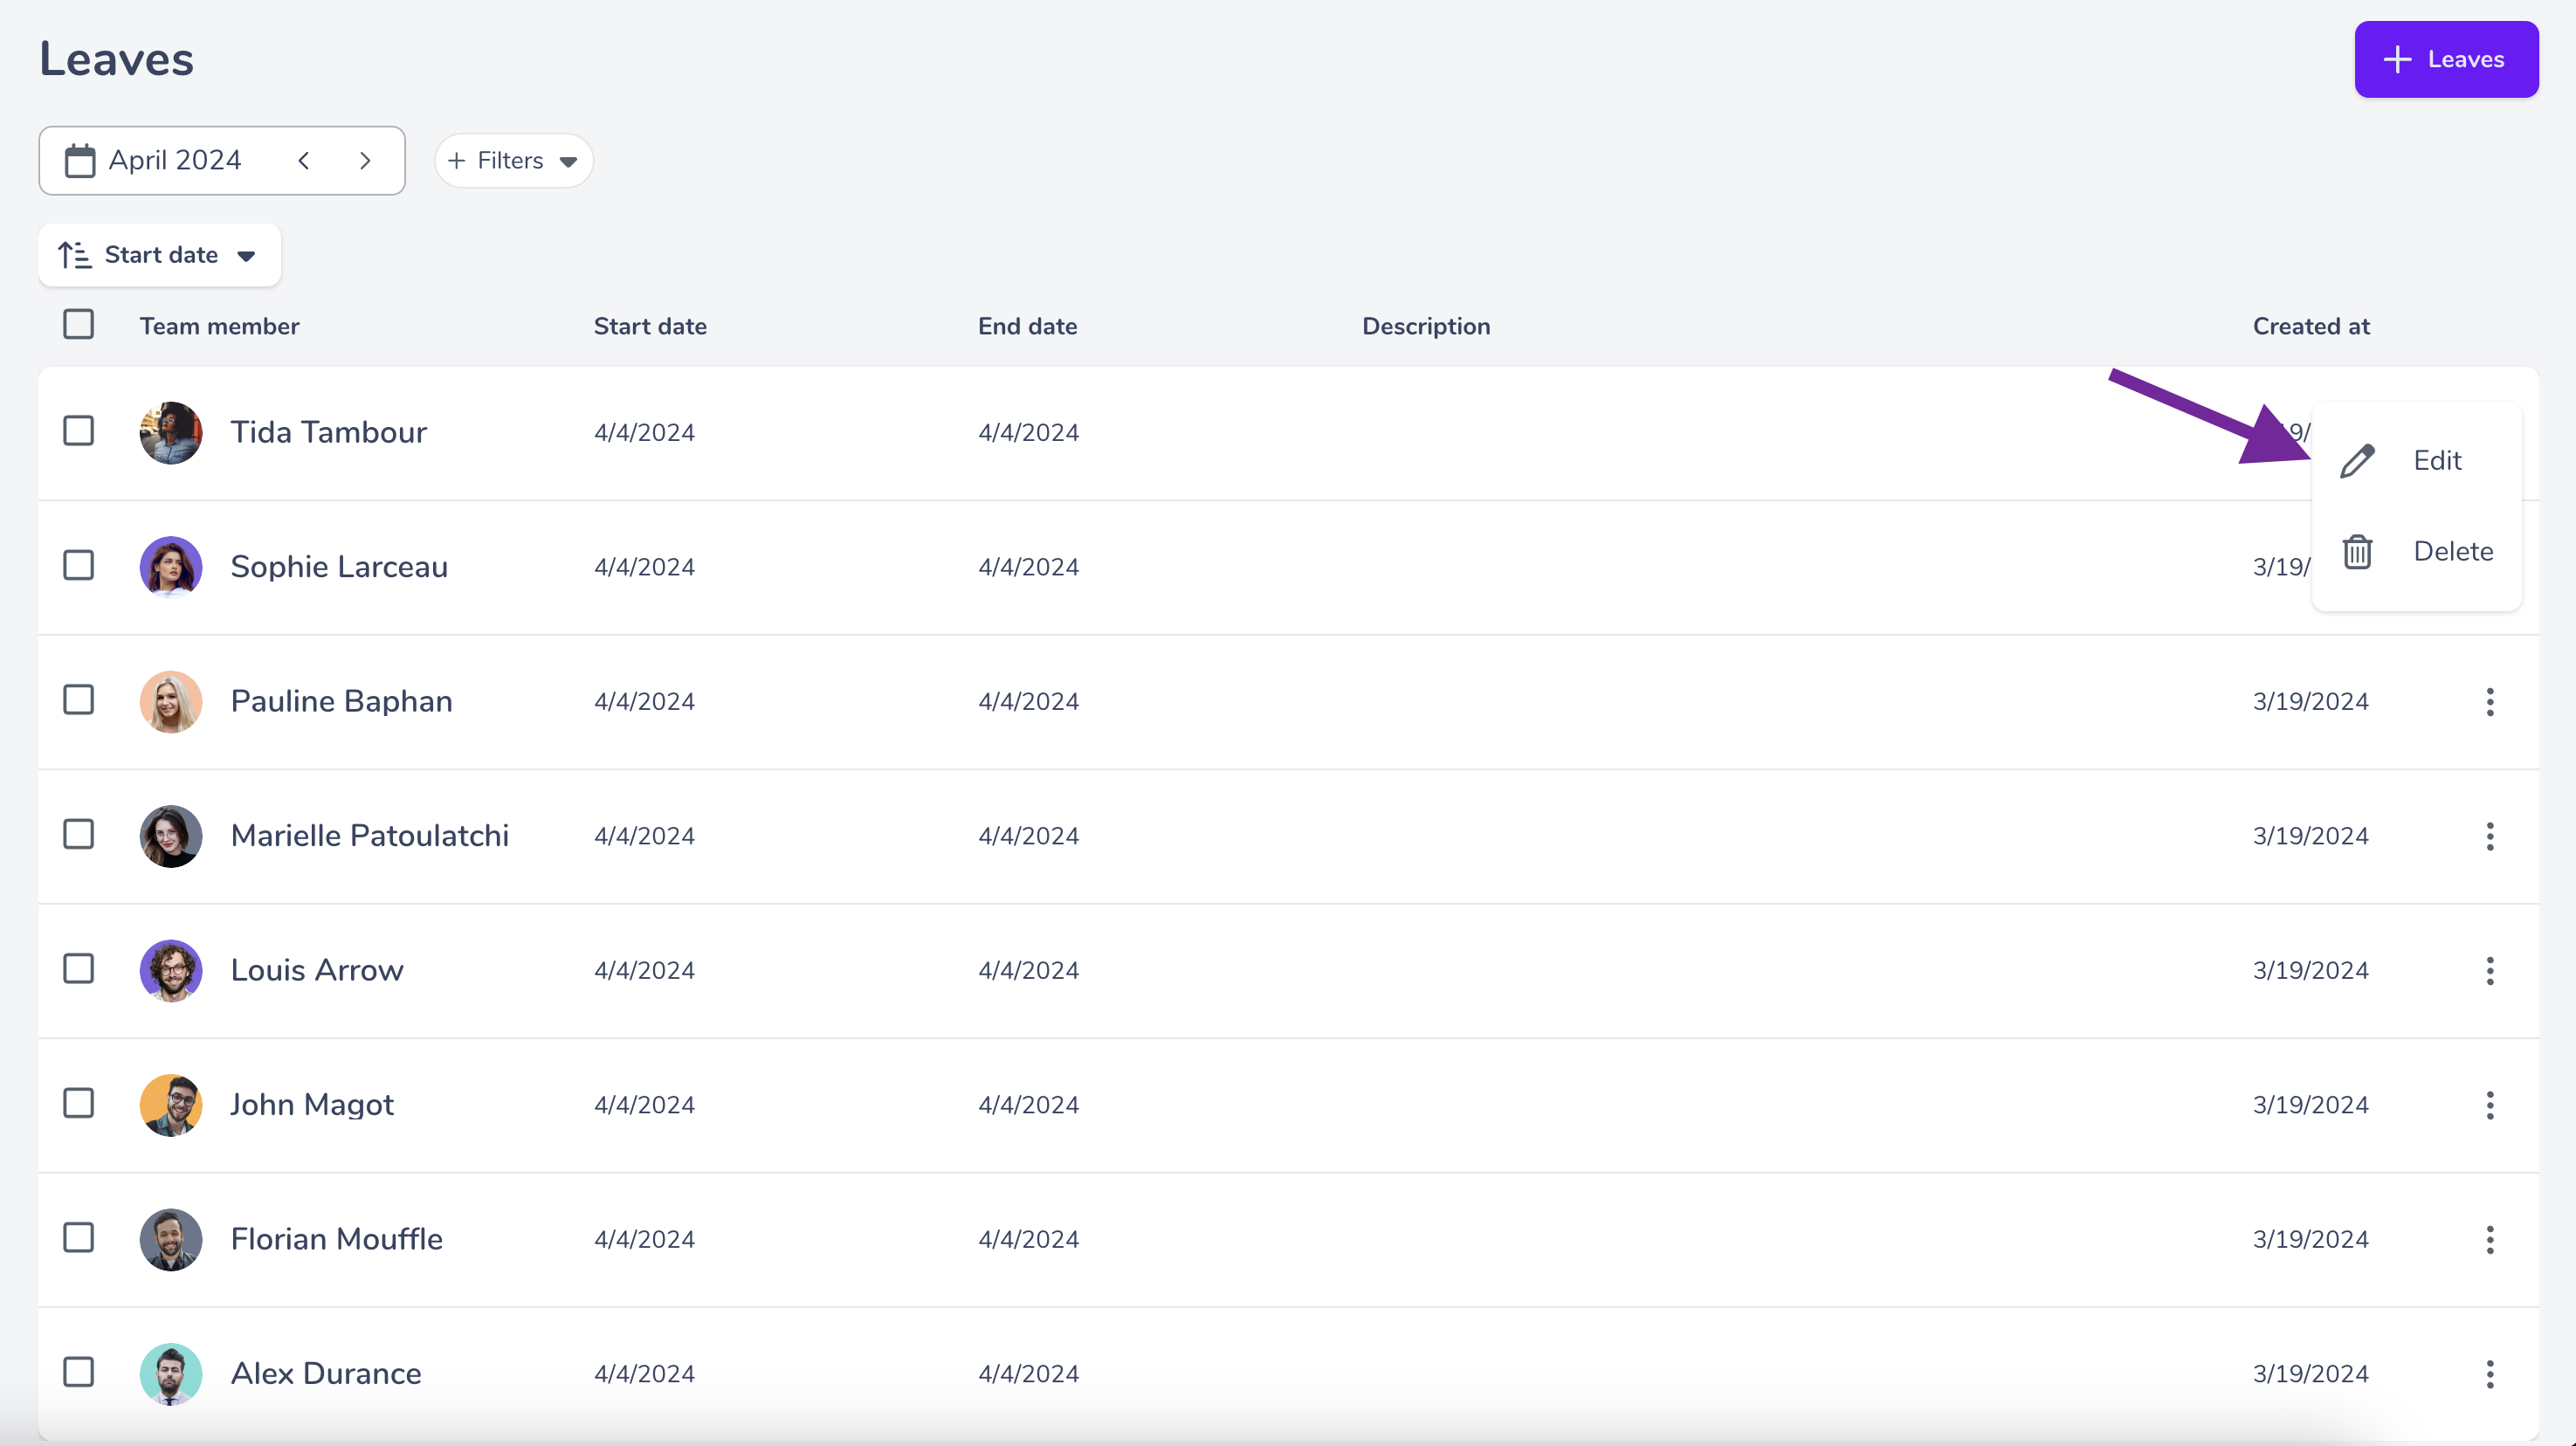
Click on the 3 dots at the end of the relevant line and choose “edit” or “delete”.
Filter the view
As for the “Working time” tab, using the filters and sorting will allow you to analyse leaves according to some axes.
Finally, as a reminder, the period visible by default is the week, but you can change it thanks to the calendar 📆
Approve time entries
Once enabled in the administration, you will have the ability to validate your collaborators’ entries.
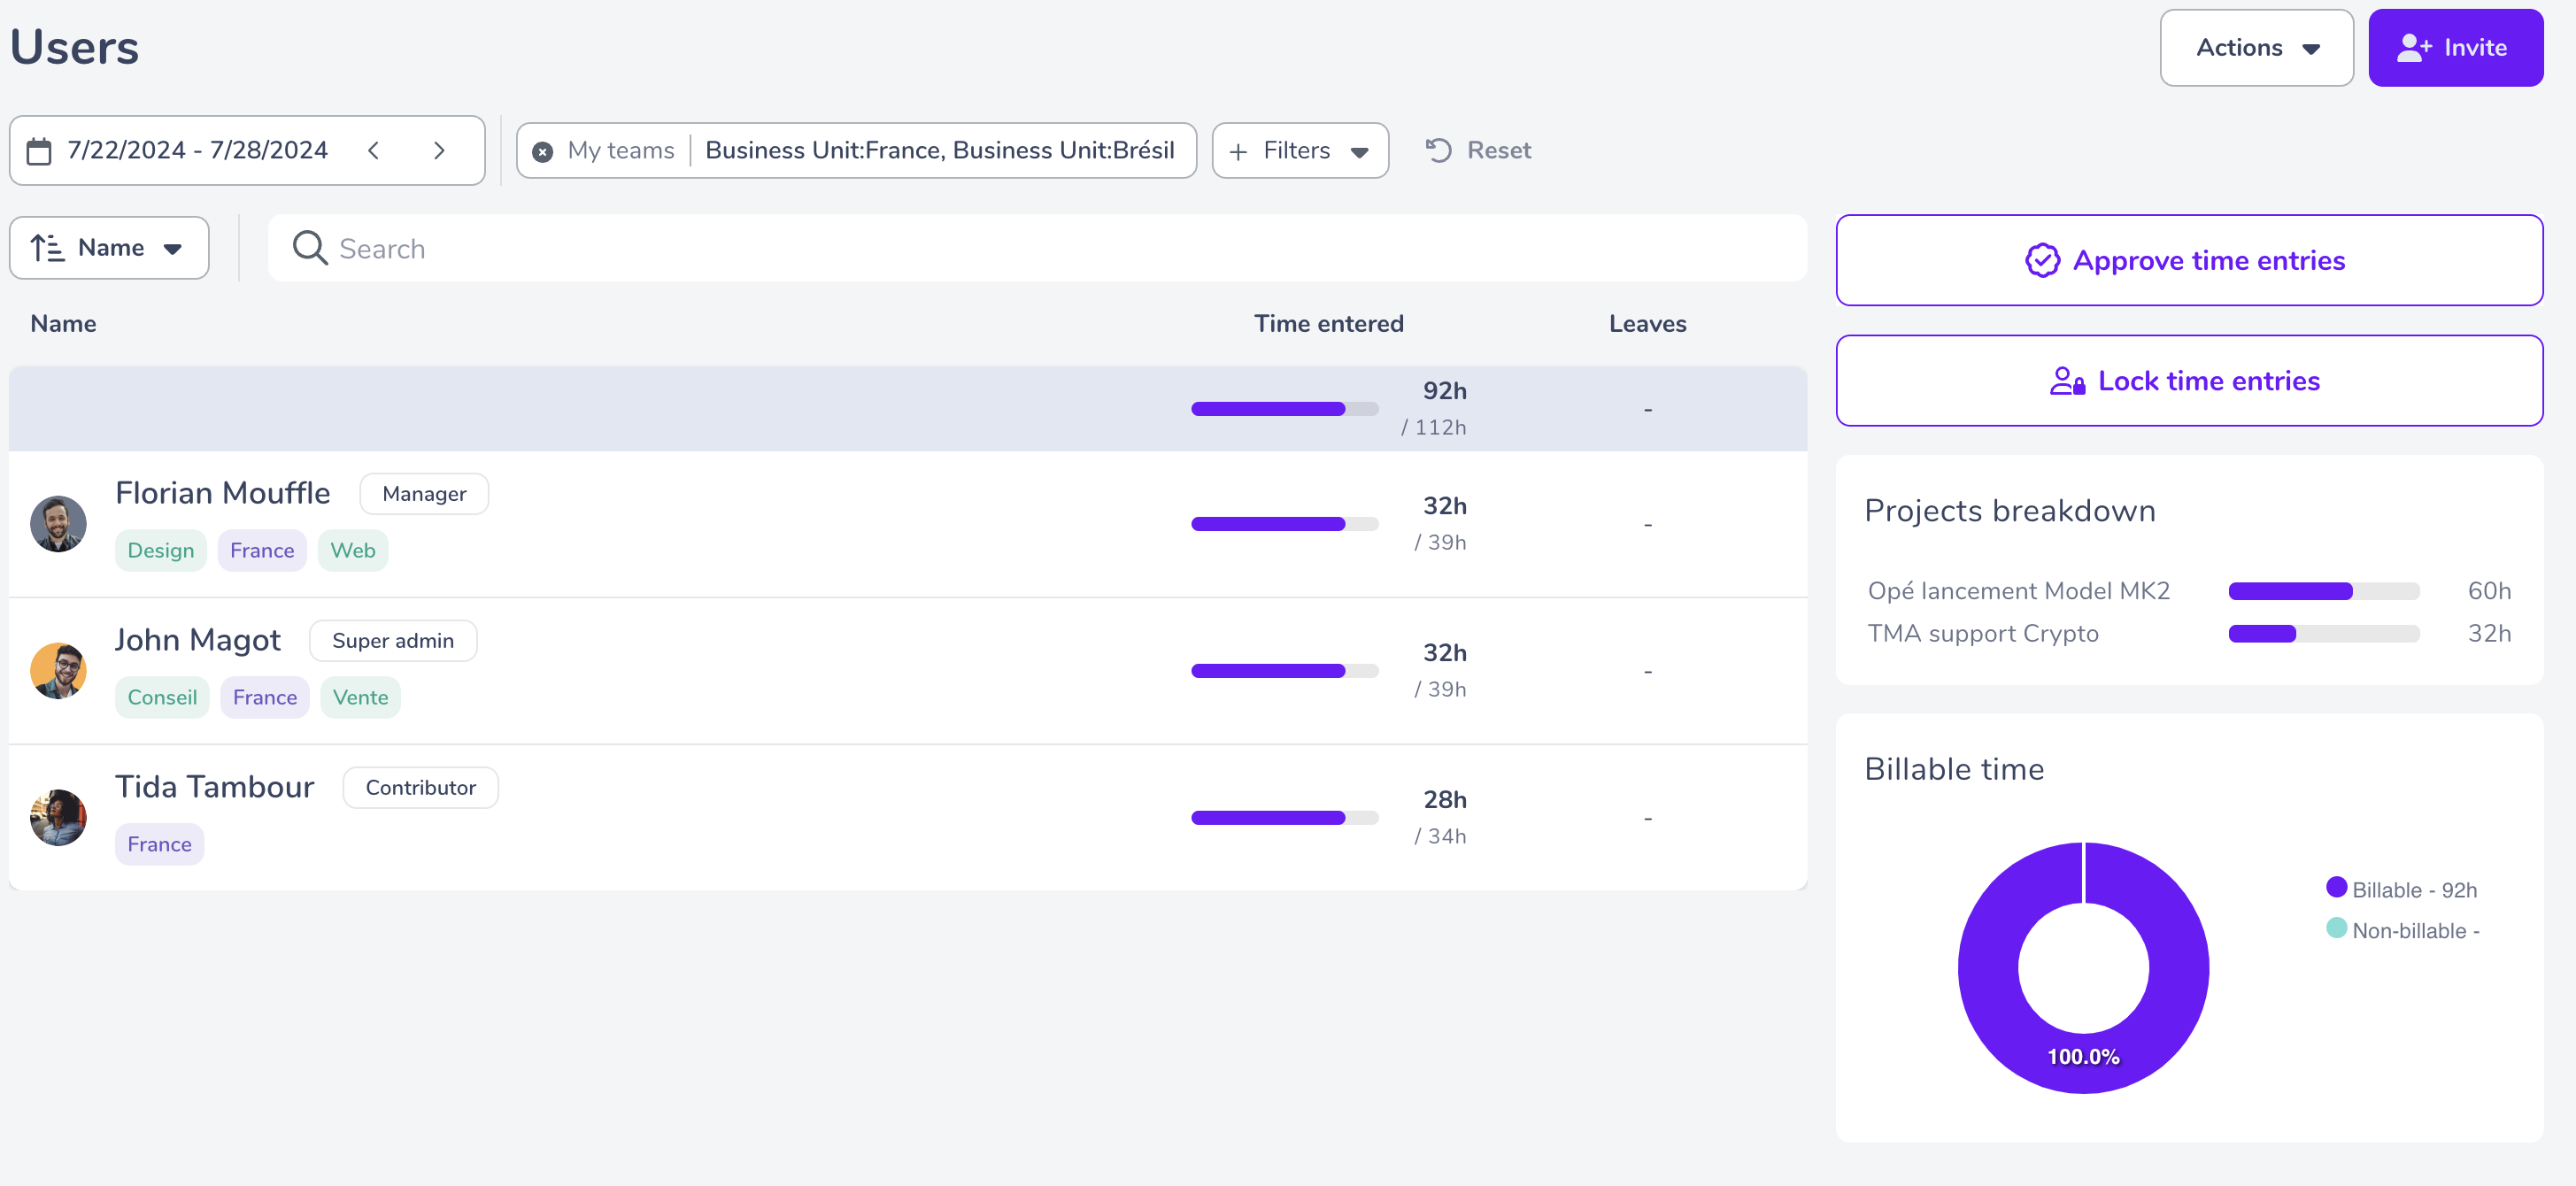
Simply click the button to access the dedicated page.
👉 The page is filtered by default to show your teams’ entries up to the date +1 of the last validation.
⚠️ For the first validation, the start date will be the date of the first entry in the system.
To start the validation process, follow these steps:
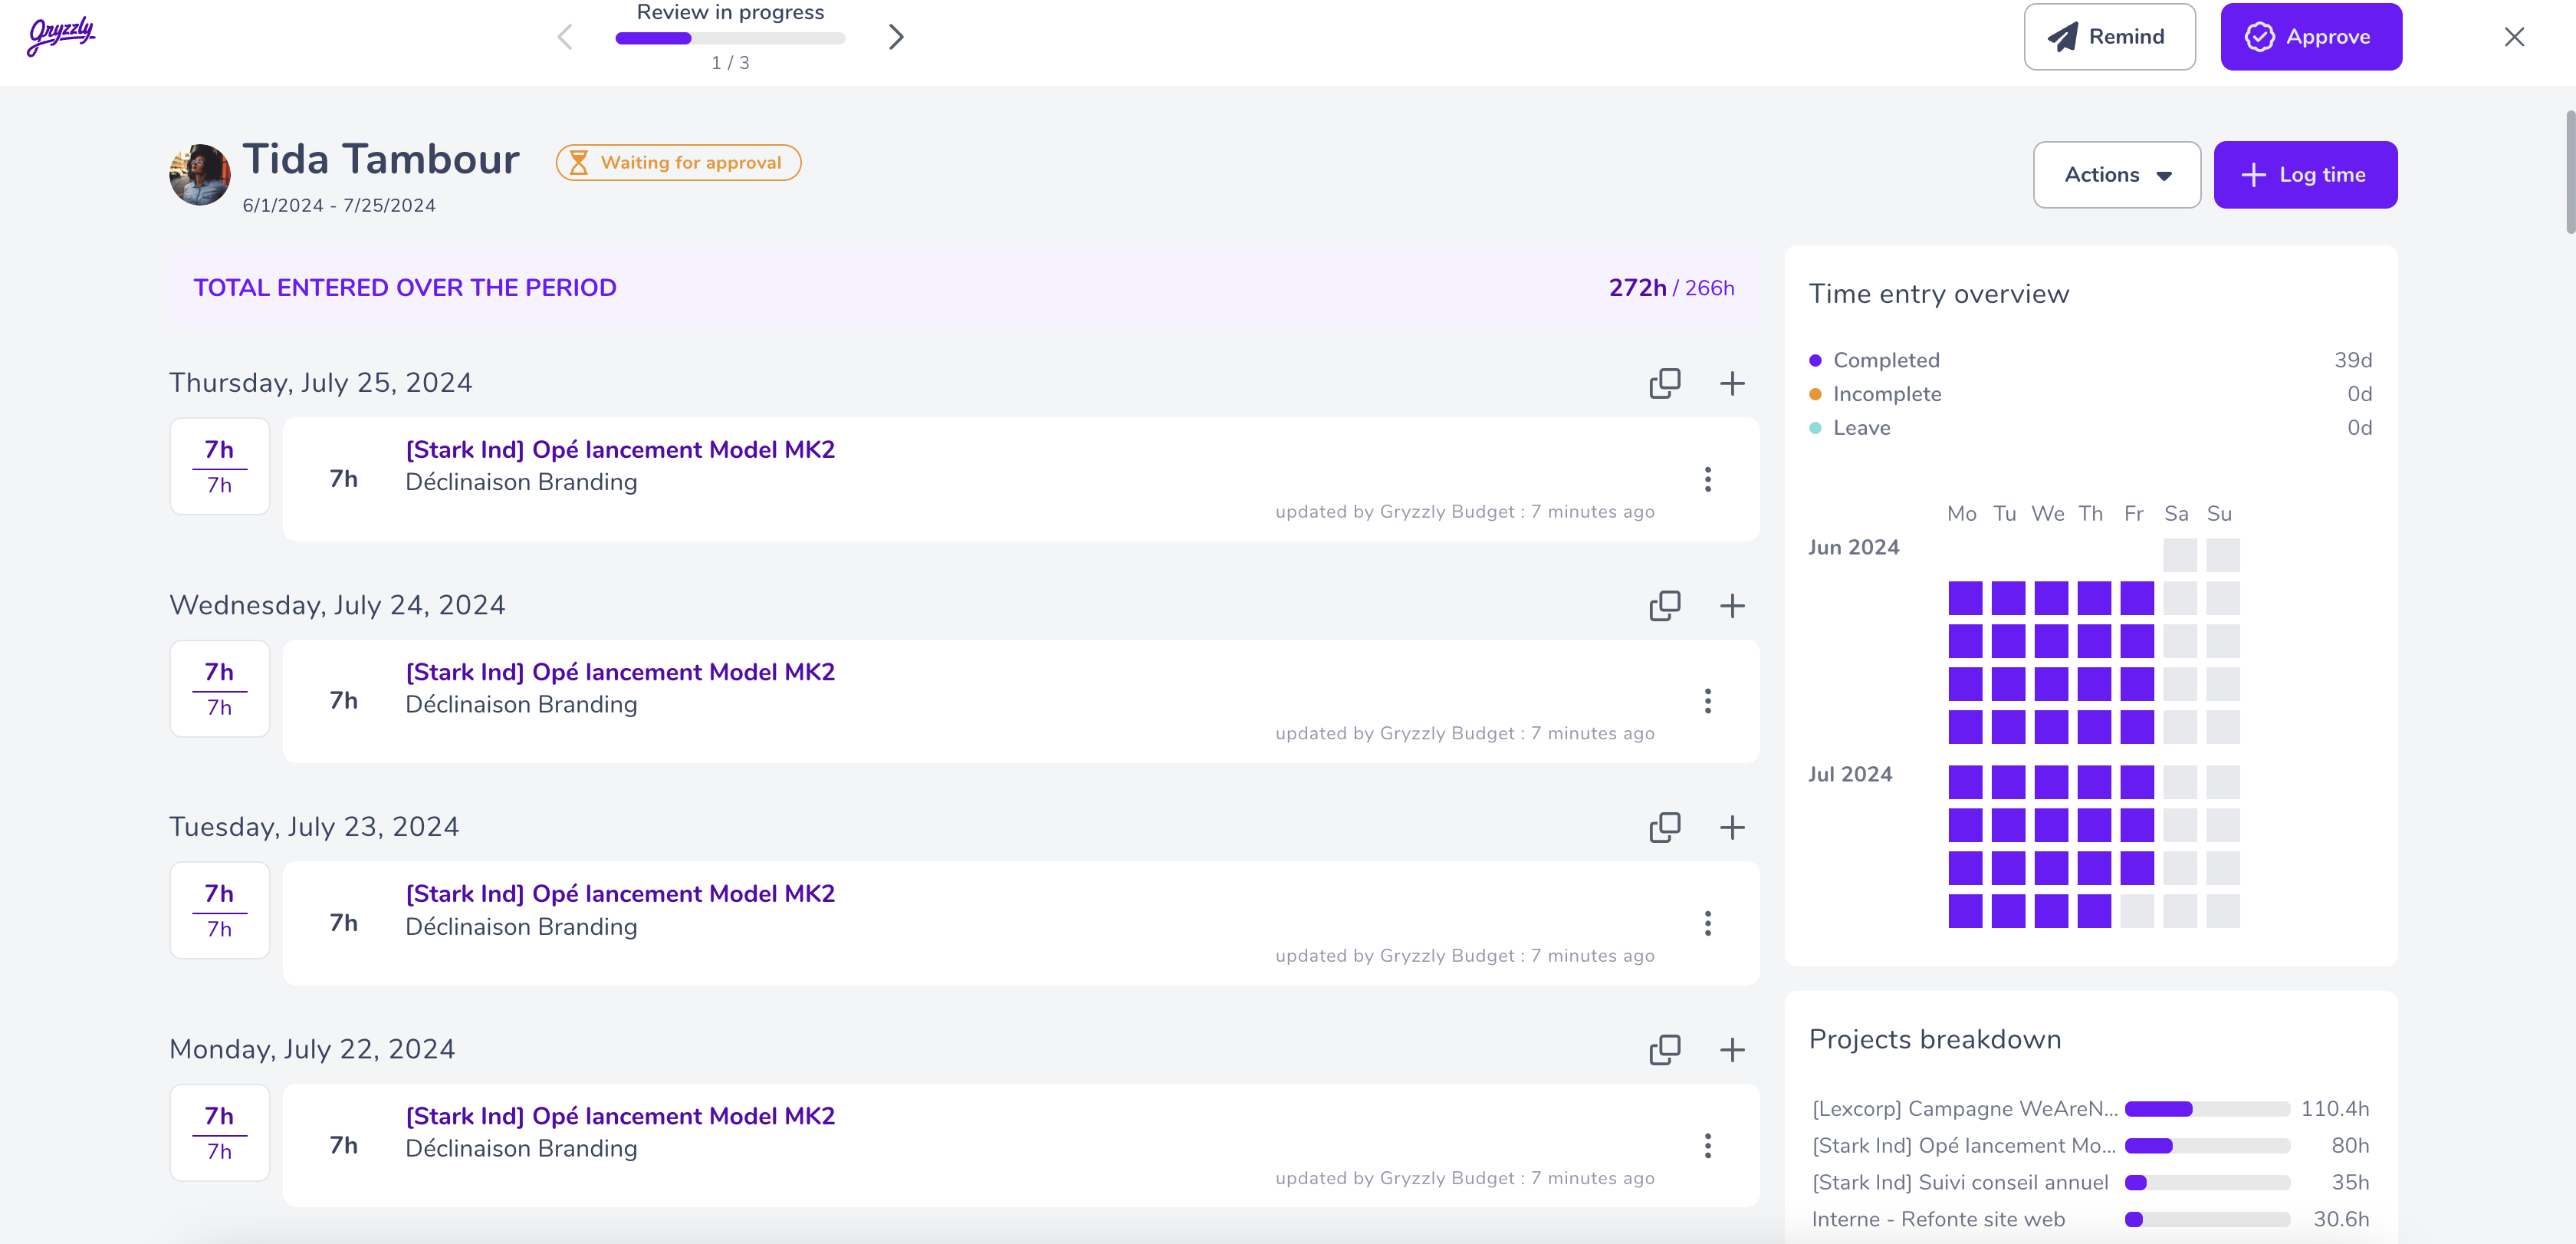
- Ensure you have applied the correct filters.
- Click on “Start Review.”
- Validate, remind, add an entry, or modify existing entries!

Note: You can also use the multiple selection feature to validate, remind, or start the review.
Once the review is done, you can cancel a validation by simply clicking “Cancel” in the “Validated” section.
You just need to choose a date after which the entries will no longer be validated. 👇